Mostly How I Built This Site
Inspiration / Reasoning
- https://santacloud.dev/posts/creating-my-blog---a-developers-tale-of-over-engineering-using-obsidian-hugo-and-github-pages/
- https://zanca.dev/blog/quartz (and probably some of the sites they link to)
- https://obsidian-gallery.craftengineer.com/
- “Official” Quartz documentation leaves a wee bit to be desired for the dummies like me
- https://ericliaointerpreting.com/setting-up-quartz-and-hugo-for-publishing-obsidian-vault/ Hmm, uses Hugo too, might look into this some more for “easy” theming and maybe more selective publishing
- See also Some interesting sites made in Obsidian
I’d been bashing my head against various walls on and off for a couple of weeks getting this thing set up. Most of my frustrations stemmed around getting the many images hosted to have this site double duty as something of a portfolio for my dabbling in photography and design. If that wasn’t a concern, the Digital Garden plugin for Obsidian would have been pretty much perfect. But (probably Gihub’s fault) it does not handle uploading more than about three images at a time, and got weird doing even that sometimes (add three images, publish, add three more, publish, and then it’d break after a few goes). The workaround of using the imgur plugin or what turned out to be a far superior option in the Image Upload Toolkit plugin was hit n miss too. Imgur would sometimes work, sometimes return this error, sometimes that error, and the whole palaver got old. Several GitHub repos were killed during the making of this film.
Micro.blog also seems pretty amazing (and has a lot of social features), but alas, their photo support didn’t match up with what I was looking for.
So, Quartz
Quartz had come up a bunch in my exploration around this. Hugo too (and I’d also heard of it from Brett Terpstra, not sure if he’s still using it to handle his excellent site) but Quartz seemed less hassle, and had also been made with Obsidian in mind, so Quartz won out, and is (or has?) allowed for these words to be beamed across the internet.
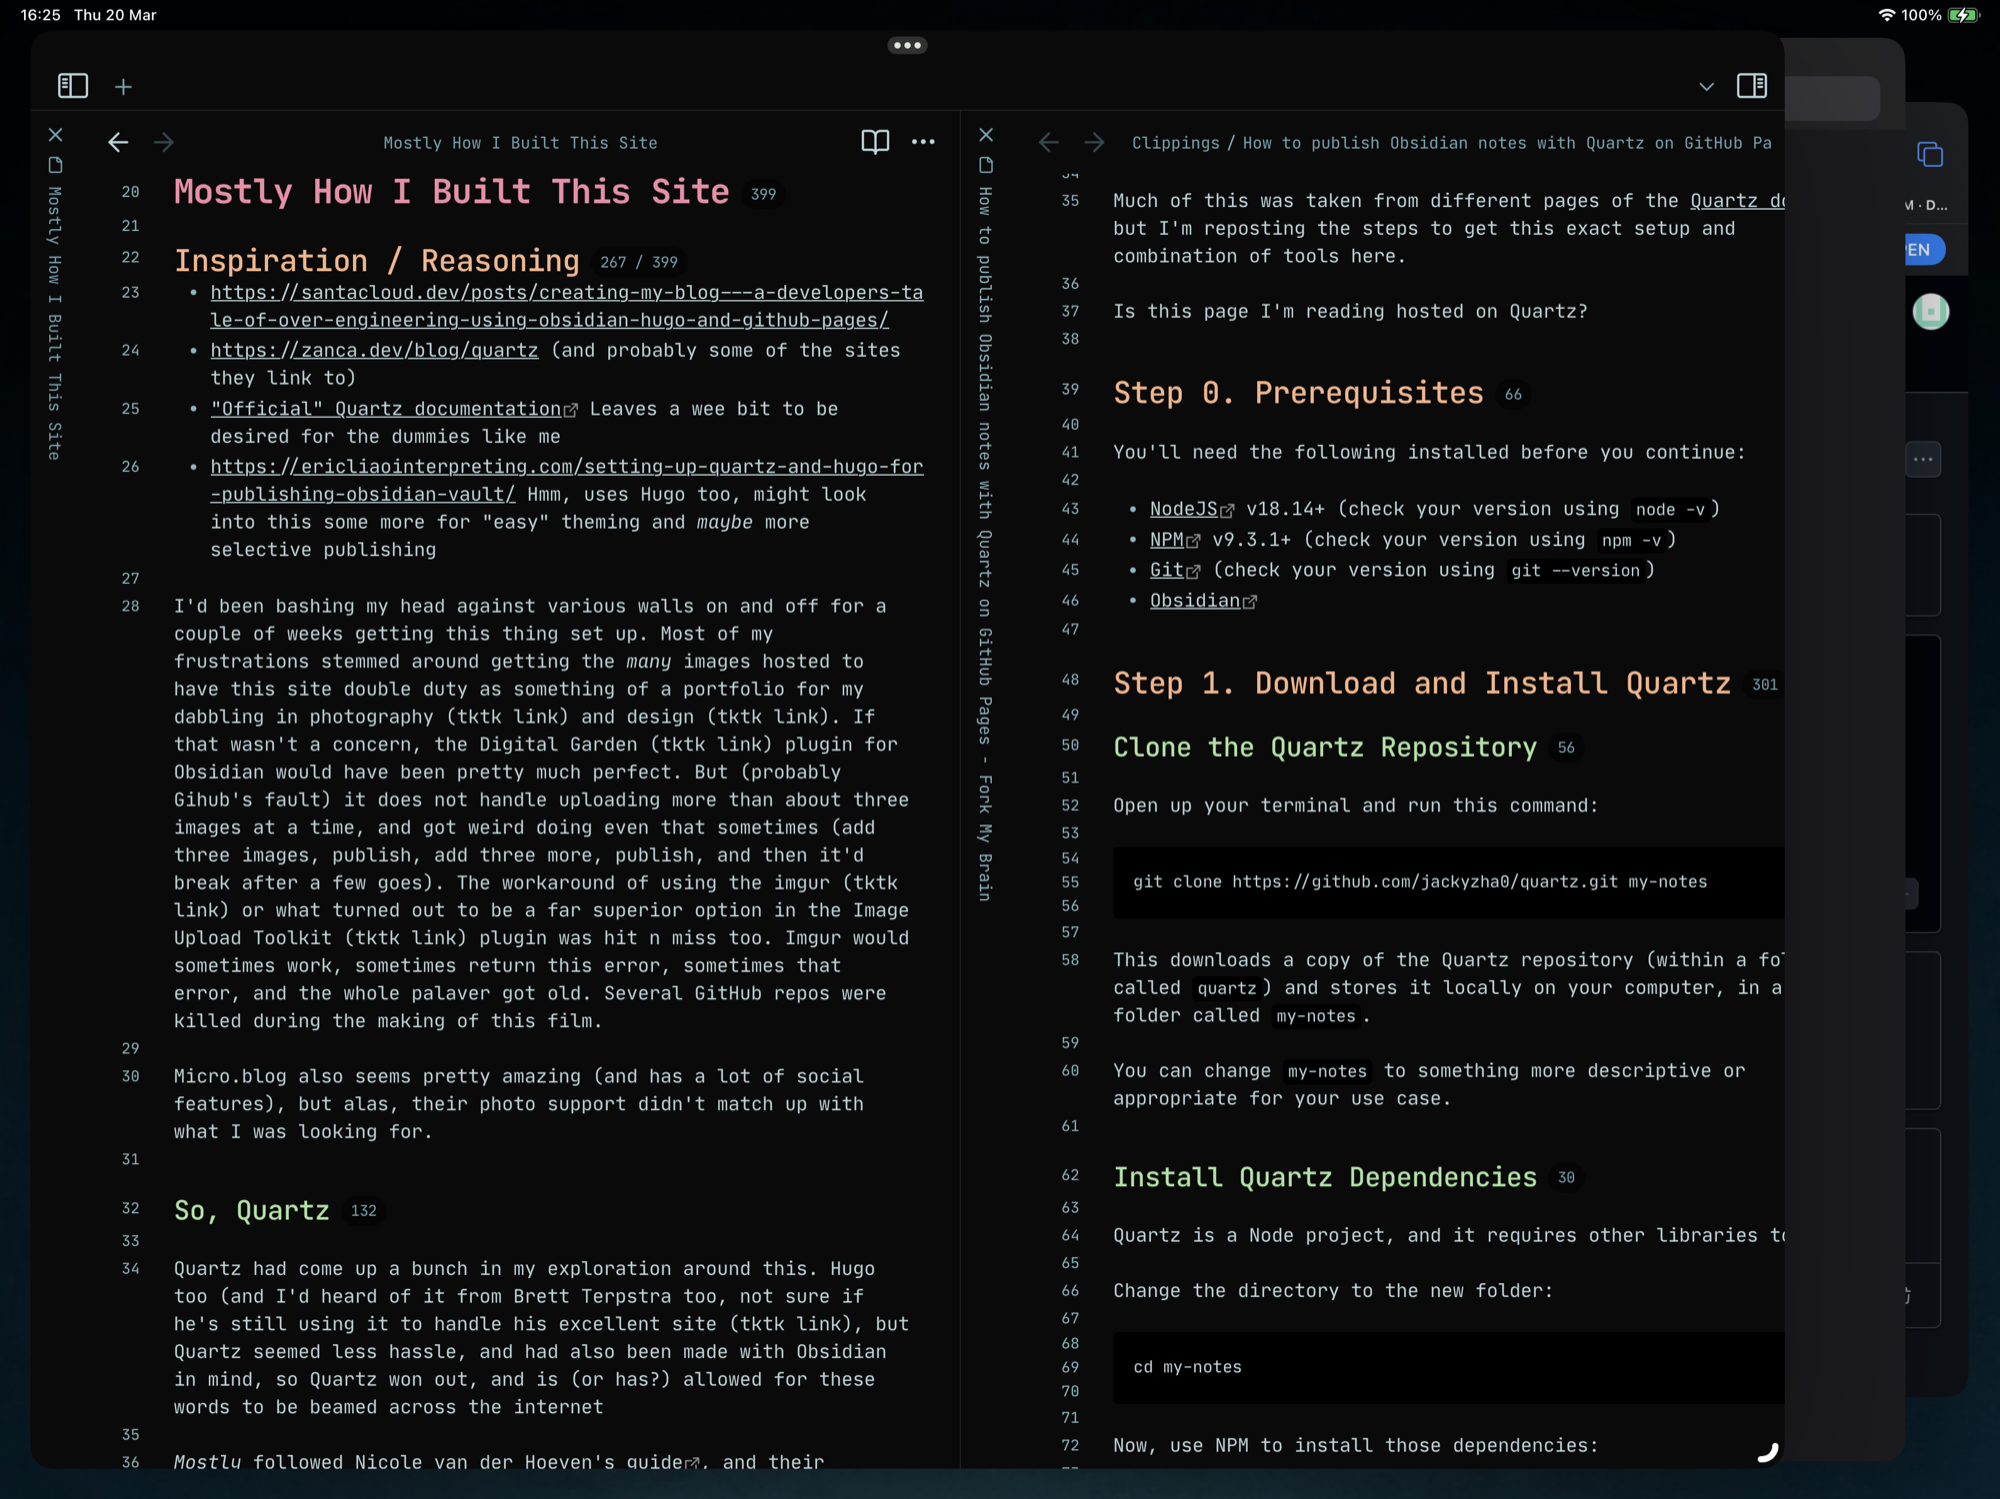
Mostly followed Nicole van der Hoeven’s guide, and their accompanying video was handy too. I shall attempt to rip out only the bits of Nicole’s guide that got me stuck for a moment, or I otherwise diverged from the path laid out there. I’d suggest having this open alongside Nicole’s guide for easy cross-referencing, I’m not going to duplicate all of her work in this doc.
Step 0. Prerequisites
There will be some command line stuff. It’s not complicated assuming you’re comfortable blindly copying and pasting commands into Terminal. There’s only a couple that need personalising to your specific setup.
Step 0a. This is all a lot easier using the Quartz Syncer plugin now. It allows publishing from directly within Obsidian, much like the official Publish, and/or Digital Garden plugin. The relevant parts from this guide are anything to do with configuring the (online) GitHub repo. There’s no need to have a locally cloned version, although I’m keeping mine for easier troubleshooting/poking around. Quick n dirty guide without requiring a local Quartz install is available here
Step 1. Download And Install Quartz
All pretty straightforward this part. I would point out that at some point I hit a roadblock much further along and returned to the start/this part. If you do that, check where you are in the Terminal file tree. I ended up with a Quartz installation inside my old Quartz installation and folders inside folders and ended up starting again again because of that tiny error. Don’t you do it, bazooka goblin.
Fortunately my Obsidian setup was already using the “Treat links as shortest path” option, so I didn’t have to make any changes around that.
Step 2. Set Up a GitHub Repository
Just don’t close/click anything in the GitHub window once the repo has been created. It is possible to wrangle what that link is you need for changing the origin Remote, but extra palaver if you’re not paying attention.
If you’ve ran through it more than once, can skip the initial git remote -v command too, and skip to changing it to match your personal repo.
Step 3. Create an Obsidian Vault
This might be where things start to get a bit more complicated. As I already had years of notes of varying quality and “publishability”, I didn’t particularly want to start from scratch. There’s a bunch of Daily Notes, and work related stuff, and other things that probably should not be floating around on the interwebs.
I didn’t 100% do things in this order, but think this is how I’d handle it if I was starting over from scratch.
Mark everything in Your Vault as “draft”
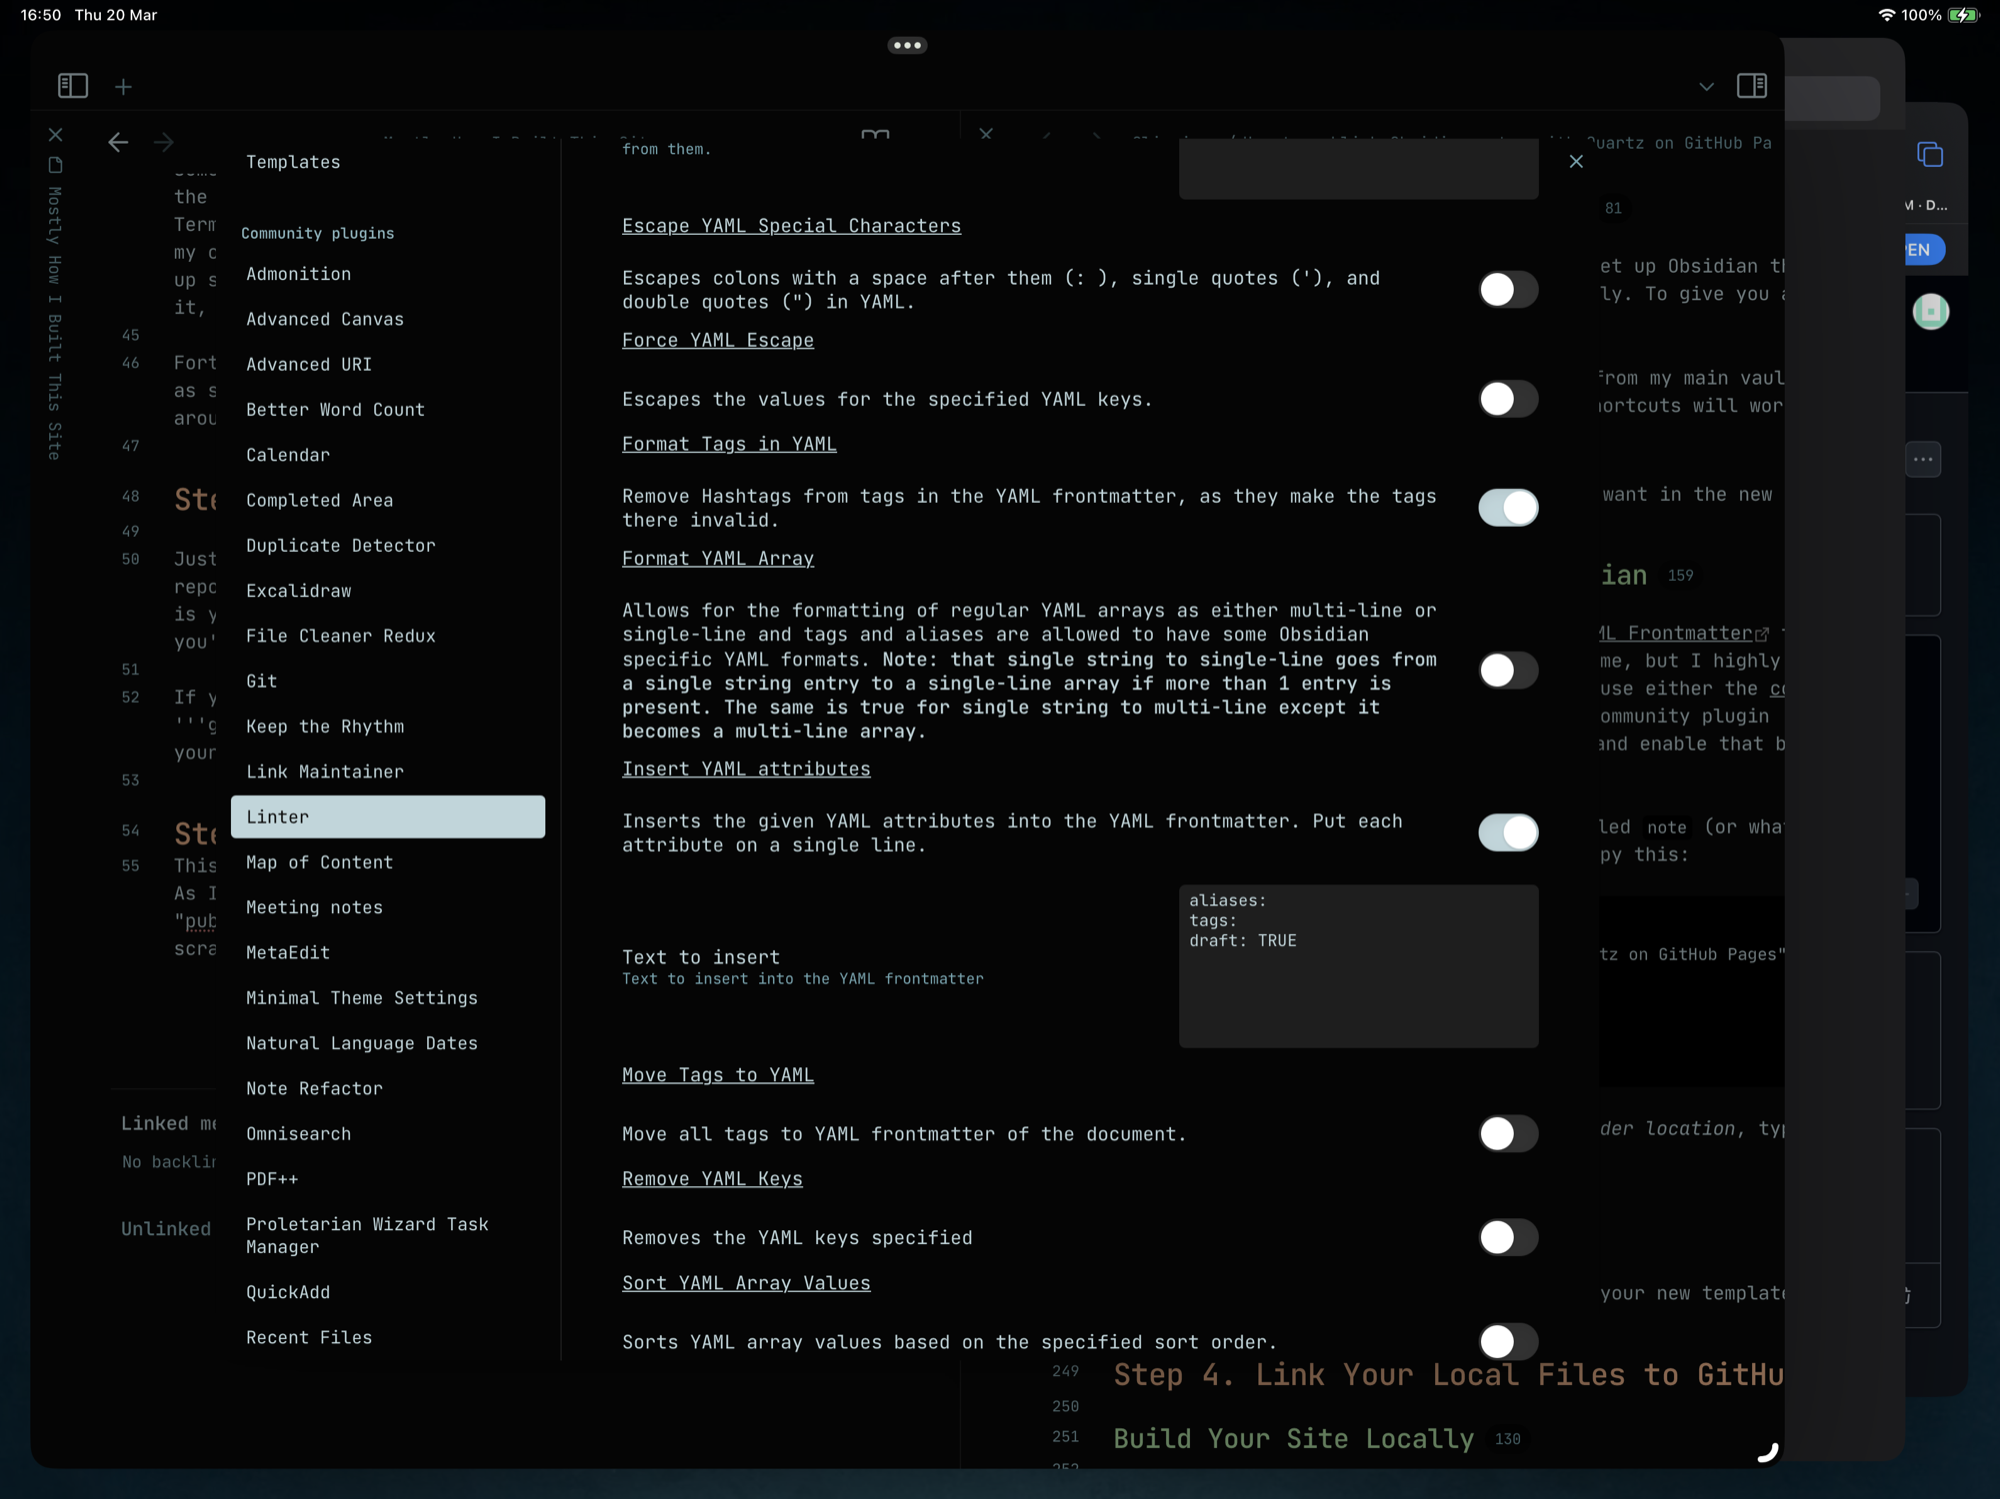
Quartz won’t publish anything to your site that has the property of “draft: true”. So, using the Linter Plugin, I added that to the “Text to insert” box in the “YAML” tab of Linter’s settings. Hit the “Lint all files in the vault” option from the command palette, and give it a few seconds (or more) to trawl through and update all the files. Then, as I didn’t have a massive amount of pre-existing notes that I wanted published, I had a quick dig through my vault and unticked the property (thus making it “draft: false”) of anything I did want published, et voila.
Otherwise stick to what Nicole suggests. Though I’ve also just gone in and added a “Publish:” flag. Possibly more on that later when I’ve explored the Quartz Syncer plugin further. In theory that’ll let me tick things off and manage all the actual publishing of new content from within Obsidian itself, which is ideal, as I’d prefer to handle everything from my iPad, rather than faffing with the command line each time. I was planning to set something up to automatically run the npx quartz sync command on some sort of schedule, but it’d appear that won’t be necessary. Bonus!
Use the “.gitignore” File
From my understanding, any commands ran on your local machine will, just like it says on the tin, ignore any files (or folders) listed within the .gitignore file at the root of your repo. There are a few entries in there by default anyway, mine looks something like this now:
.DS_Store

.gitignore

node_modules

public

prof

tsconfig.tsbuildinfo

.obsidian

.quartz-cache

private/

.replit

replit.nix

Templates/

templates/

FleetingNotesApp/

LYT Kit/

Meetings/

PKM LM/

Tasks/

To read/

Resources/

Secret Sales Help Centre/

Daily Notes/

Large Attachments/

.obsidian/
- The ignores (technical term) will only take effect after you’ve made the changes. If you’ve already got stuff showing on the site (the Templates folder was my bugbear) then adding it to the ignore list won’t change anything, the content you don’t want visible will still show. BUT, if you’ve added it to the ignore list, and then remove it from the repo (I binned it from the local copy, then synced), and then add it again, the ignore thing will do its job properly and know to not publish it now. Sorted!
Watch out for Any Big Attachments
Sync to/from GitHub will fully poop the bed if you’ve got any large attachments. The problem file(s) will then get trapped in a cache somewhere, either by Quartz, or git itself, and I couldn’t find a way to stop them trying to be added to the repo after that, so they’d block any smaller changes being pushed and ended up causing me to start from scratch.
I’ve got a few hefty PDFs in my attachments folder. GitHub does not like a single file being over 100MB, hence the “Large Attachments” folder in the .gitignore list above. For now they can sit in there, Obsidian can see em/link to em as needed, but they don’t clog up syncs/pushes etc, and (more importantly) don’t clobber GitHub’s servers.
I was pleasantly surprised it accepted ALL the smaller attachments in one commit though. ~2.5GB / 500 files. Yoikes.
”Drafts” Folder
After all of the above, I realised that although they weren’t being published to the site, anything in my vault that wasn’t being specifically targeted by the .gitignore file was still available for anyone willing to do a little digging around on the GitHub repo. That was a bit of an “oh shit” moment. It might be a bit back-asswards, but they way I’ve got around that is defaulting to all new notes (and 99% of my pre-existing notes) being created inside the “Drafts” folder, and that also being listed in the .gitignore file. That way any sync/push/etc commands won’t even look at that folder. All that data is there and kept in sync across my devices, but doesn’t leave them or end up on the public internet for blackmail/corporate espionage/national security breaches. Perfect.
Anything I want to publish gets the Publish: TRUE property, and moved to the root Obsidian folder (or one of the published subfolders if appropriate).
Building Locally Might Generate a Pile of Warnings
Along the lines of “file blah blah isn’t tracked by git” in a nice and friendly yellow colour. This’ll be for anything that hasn’t been synced to GitHub yet, as well as anything covered by the .gitignore file, so (hopefully) nothing to be concerned about.
On Speeding Up Local Builds
The build process can take a minute (local and remote). I was noticing it seeming quicker to push changes to GitHub to see them than it was to build/test locally. Presumably because it had to crunch through so many images. What spread it up was rather than the standard build n serve command (which only runs on one thread/core of your machine) adding “—concurrency X” to the end (with X being the number of threads you want to want it to run on) sped things up massively, so that command became npx quartz build --serve --concurrency 8 in my use.
Step 5. Host Your Vault Online
Aspirations of greatness maybe, but I’ve been using vscode to edit any of the nerdy files as needed, including the deploy.yml file. Not required.
It feels like there should be another step in the “Create a GitHub Action” part, but really, that’s it. There isn’t a “save” or “ok” or similar button that needs hitting to move on.
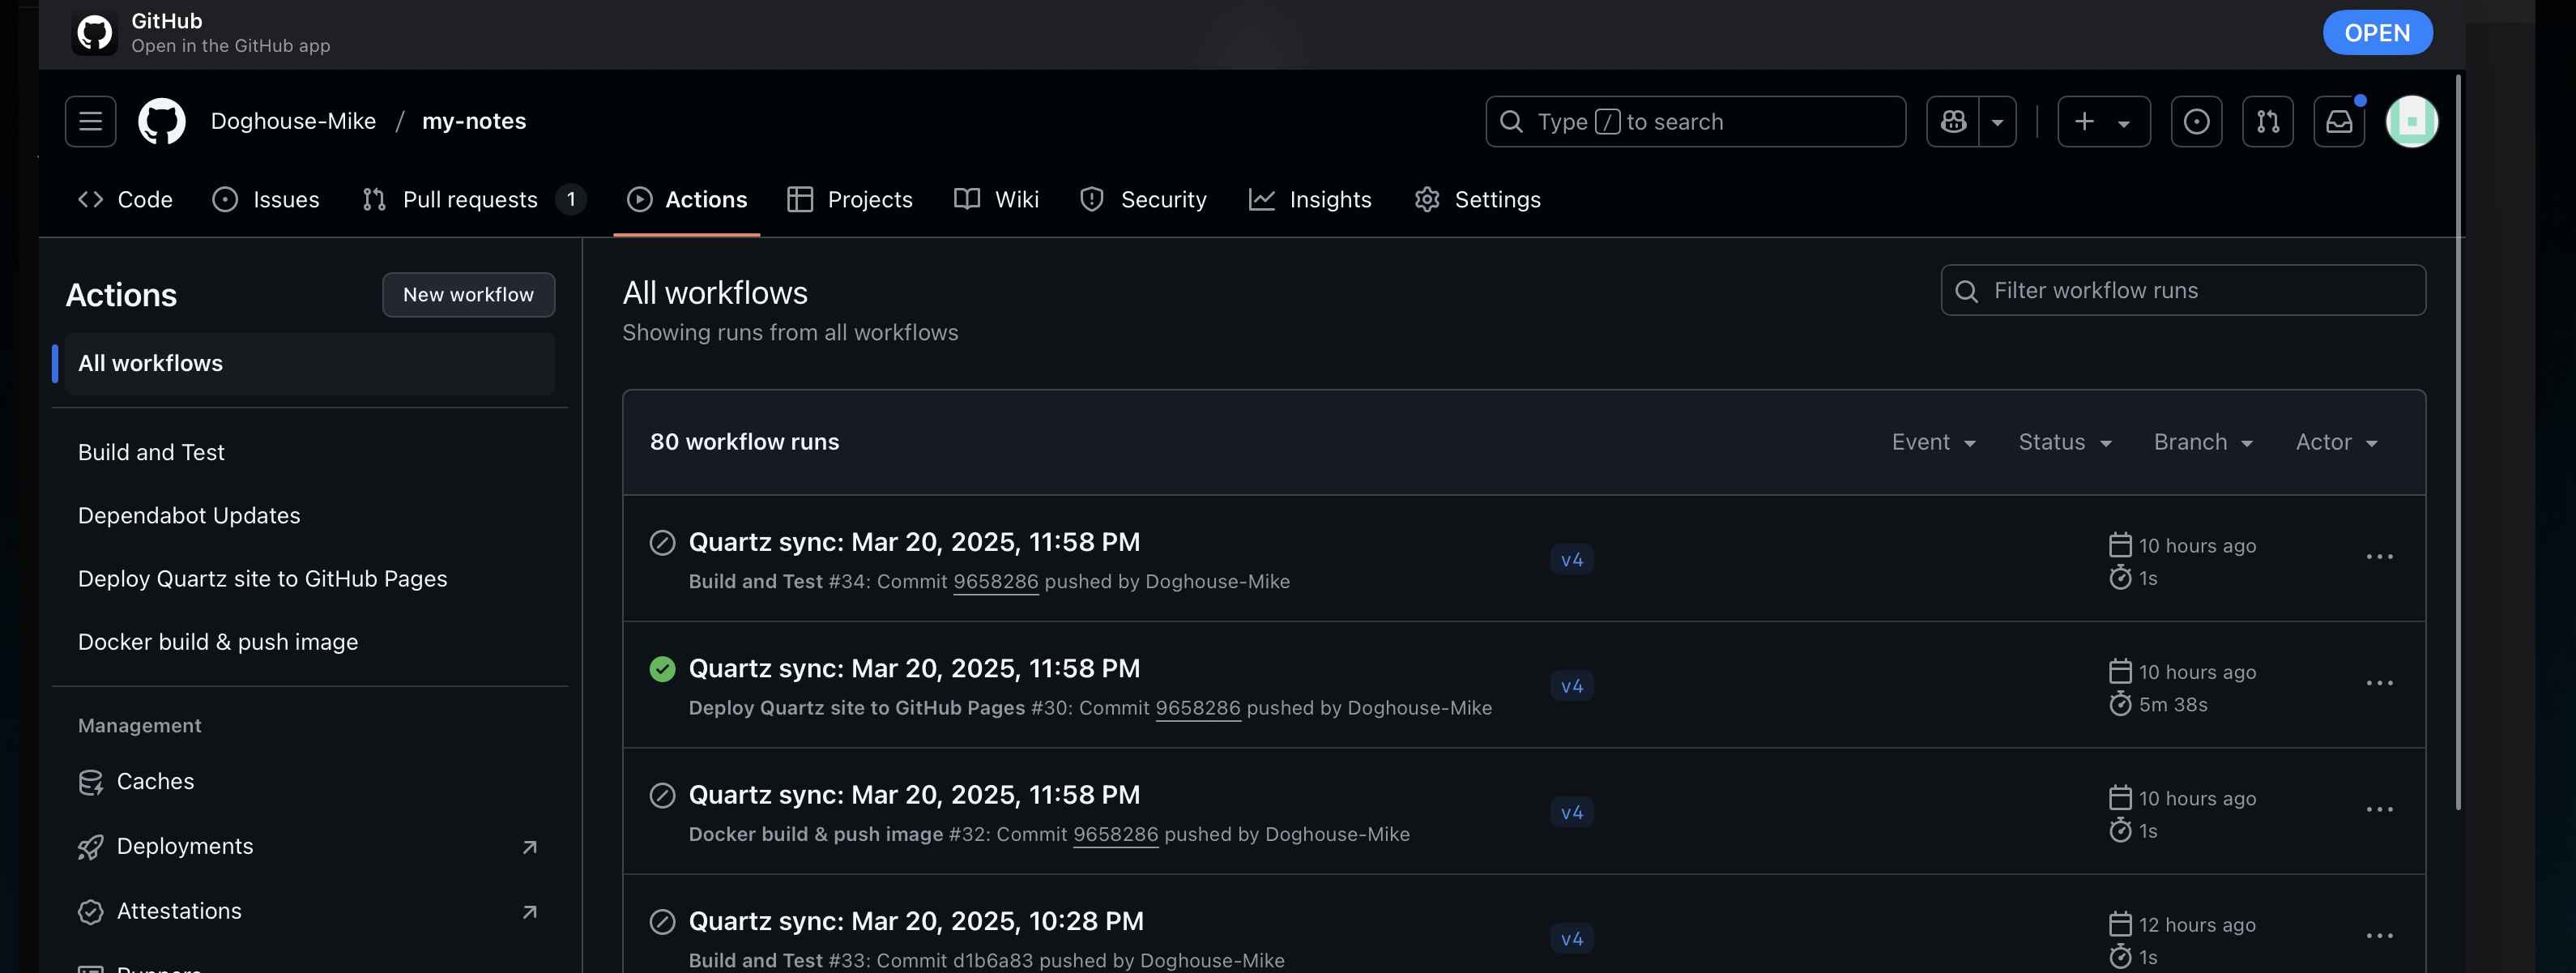
You might need to exercise a little patience on the “Behold Your New Site!” step. Presumably because I’ve got the pile of attachments to crunch through, GitHub’s servers can take a few minutes to process everything and deploy the actual site ready to be viewed in any old browser. You can keep an eye on its progress via https://github.com/YOURGITHUBACCOUNT/YOURREPONAME/actions (or by clicking that handy “Actions” button along the top of the repo page when you’re signed into the GitHub site).
Optional Extras
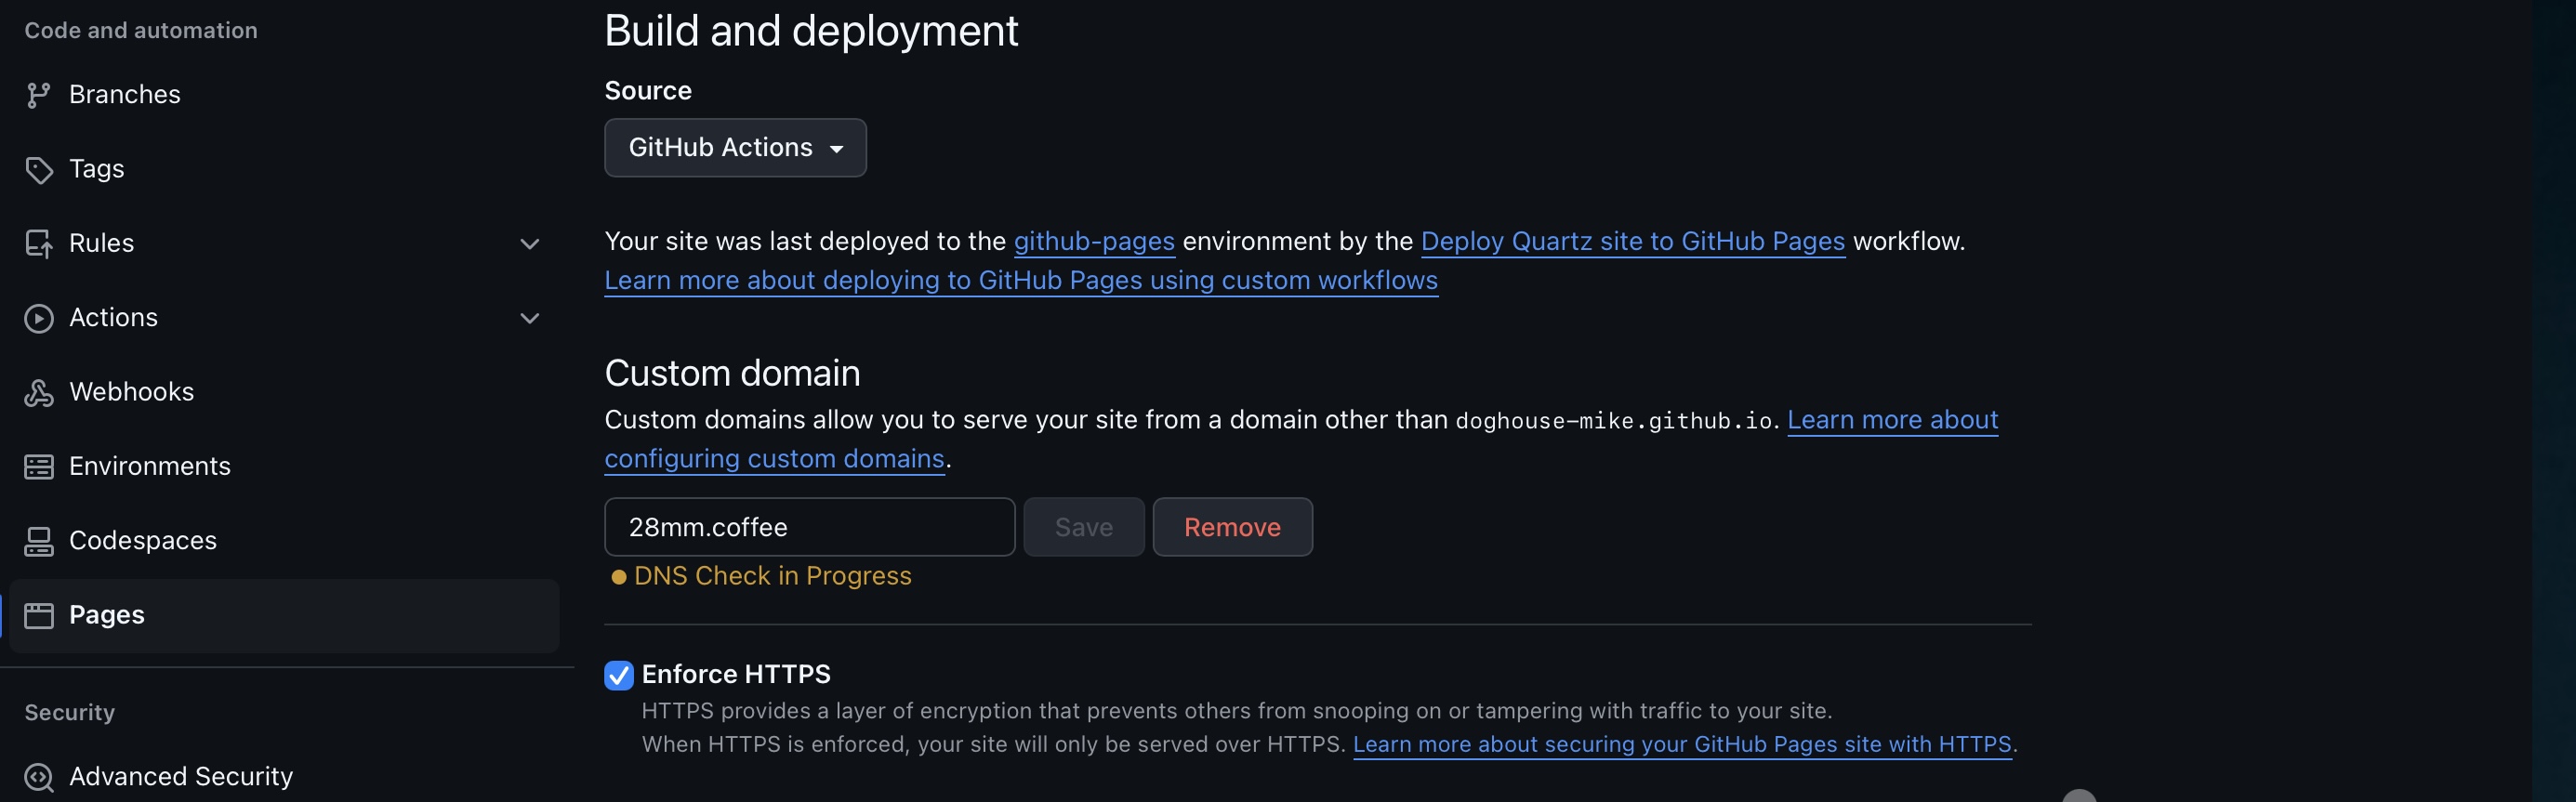
Custom Domain
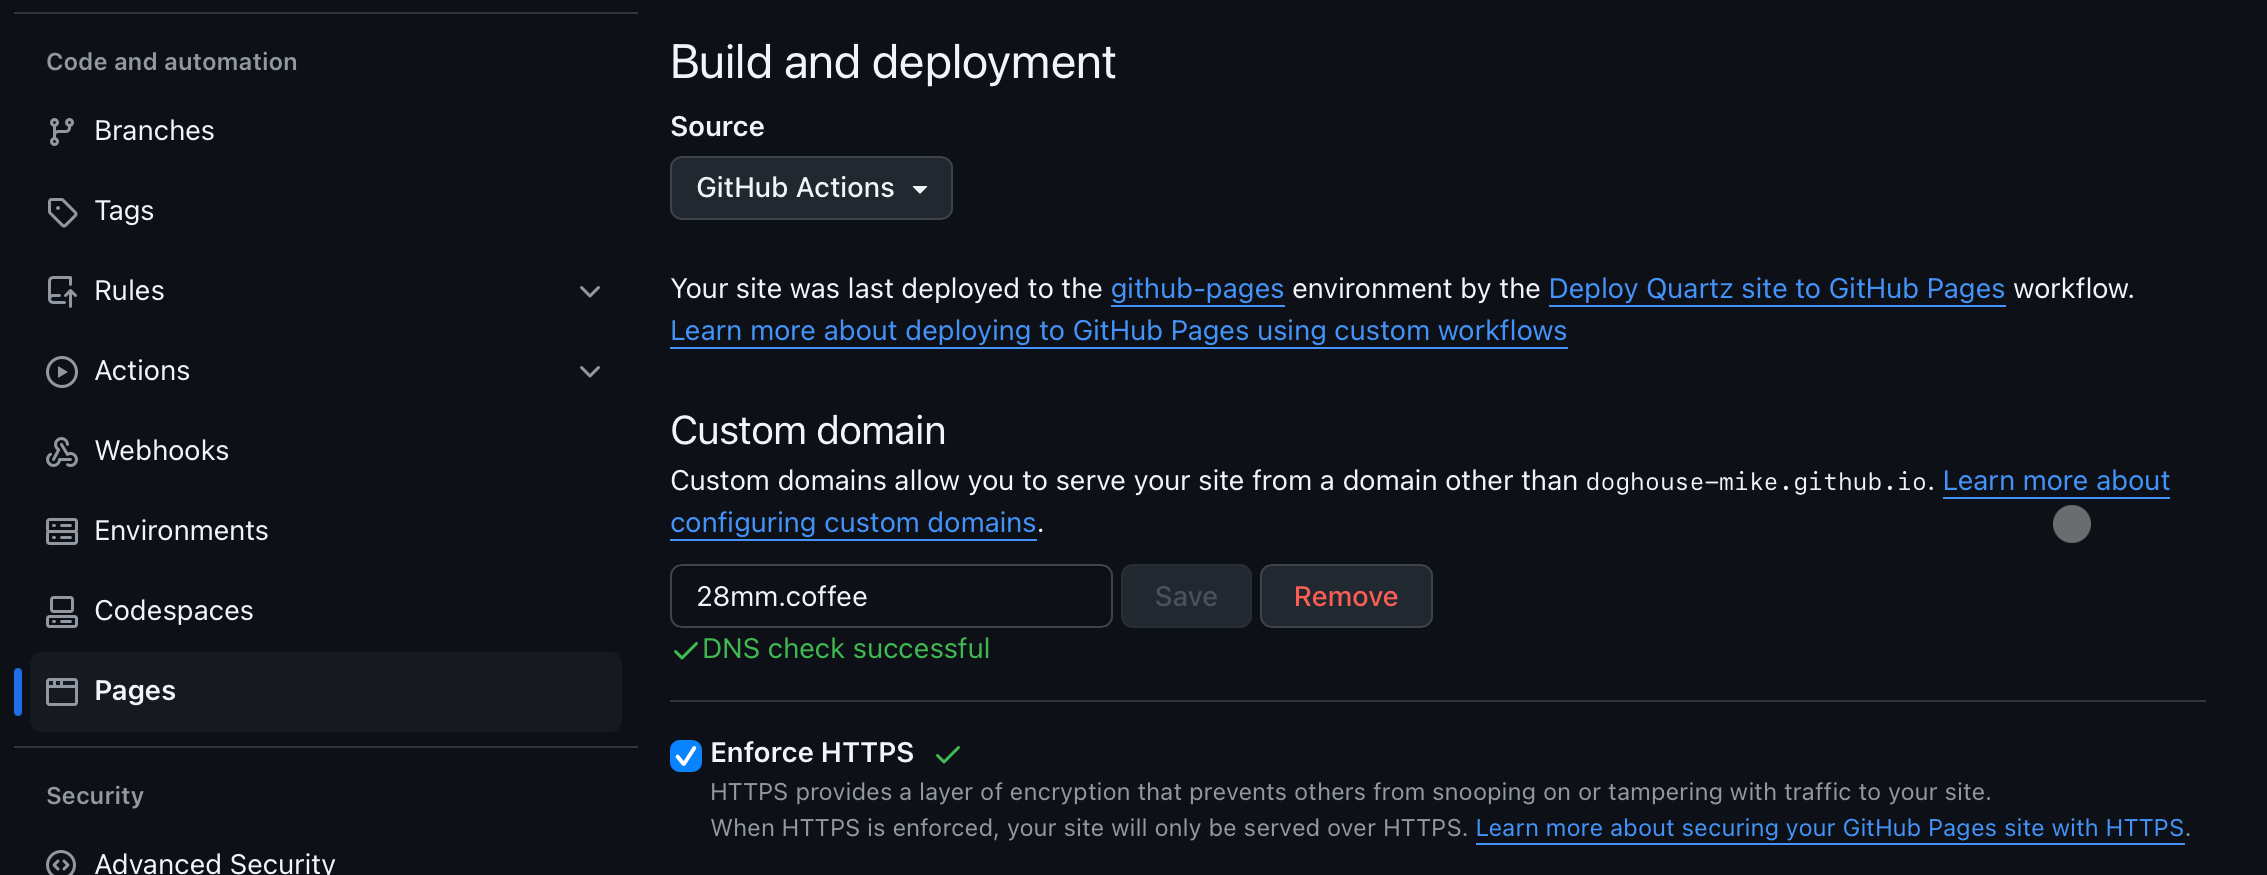
Porkbun has a “set up for github” button, so was a matter of clicking of that, then adding the domain in to the “Pages” section of the settings for the GitHub repo.
Theming
Themes were easy enough to setup using quartz-themes. There is a pile of options to choose from the list and previews. When I initially set one up it was a bit more of a faff to do, but now just involves adding a couple of lines to the deploy.yml file. Almost guaranteed not to break anything, currently using Nord
Setting Up Comments via Giscus
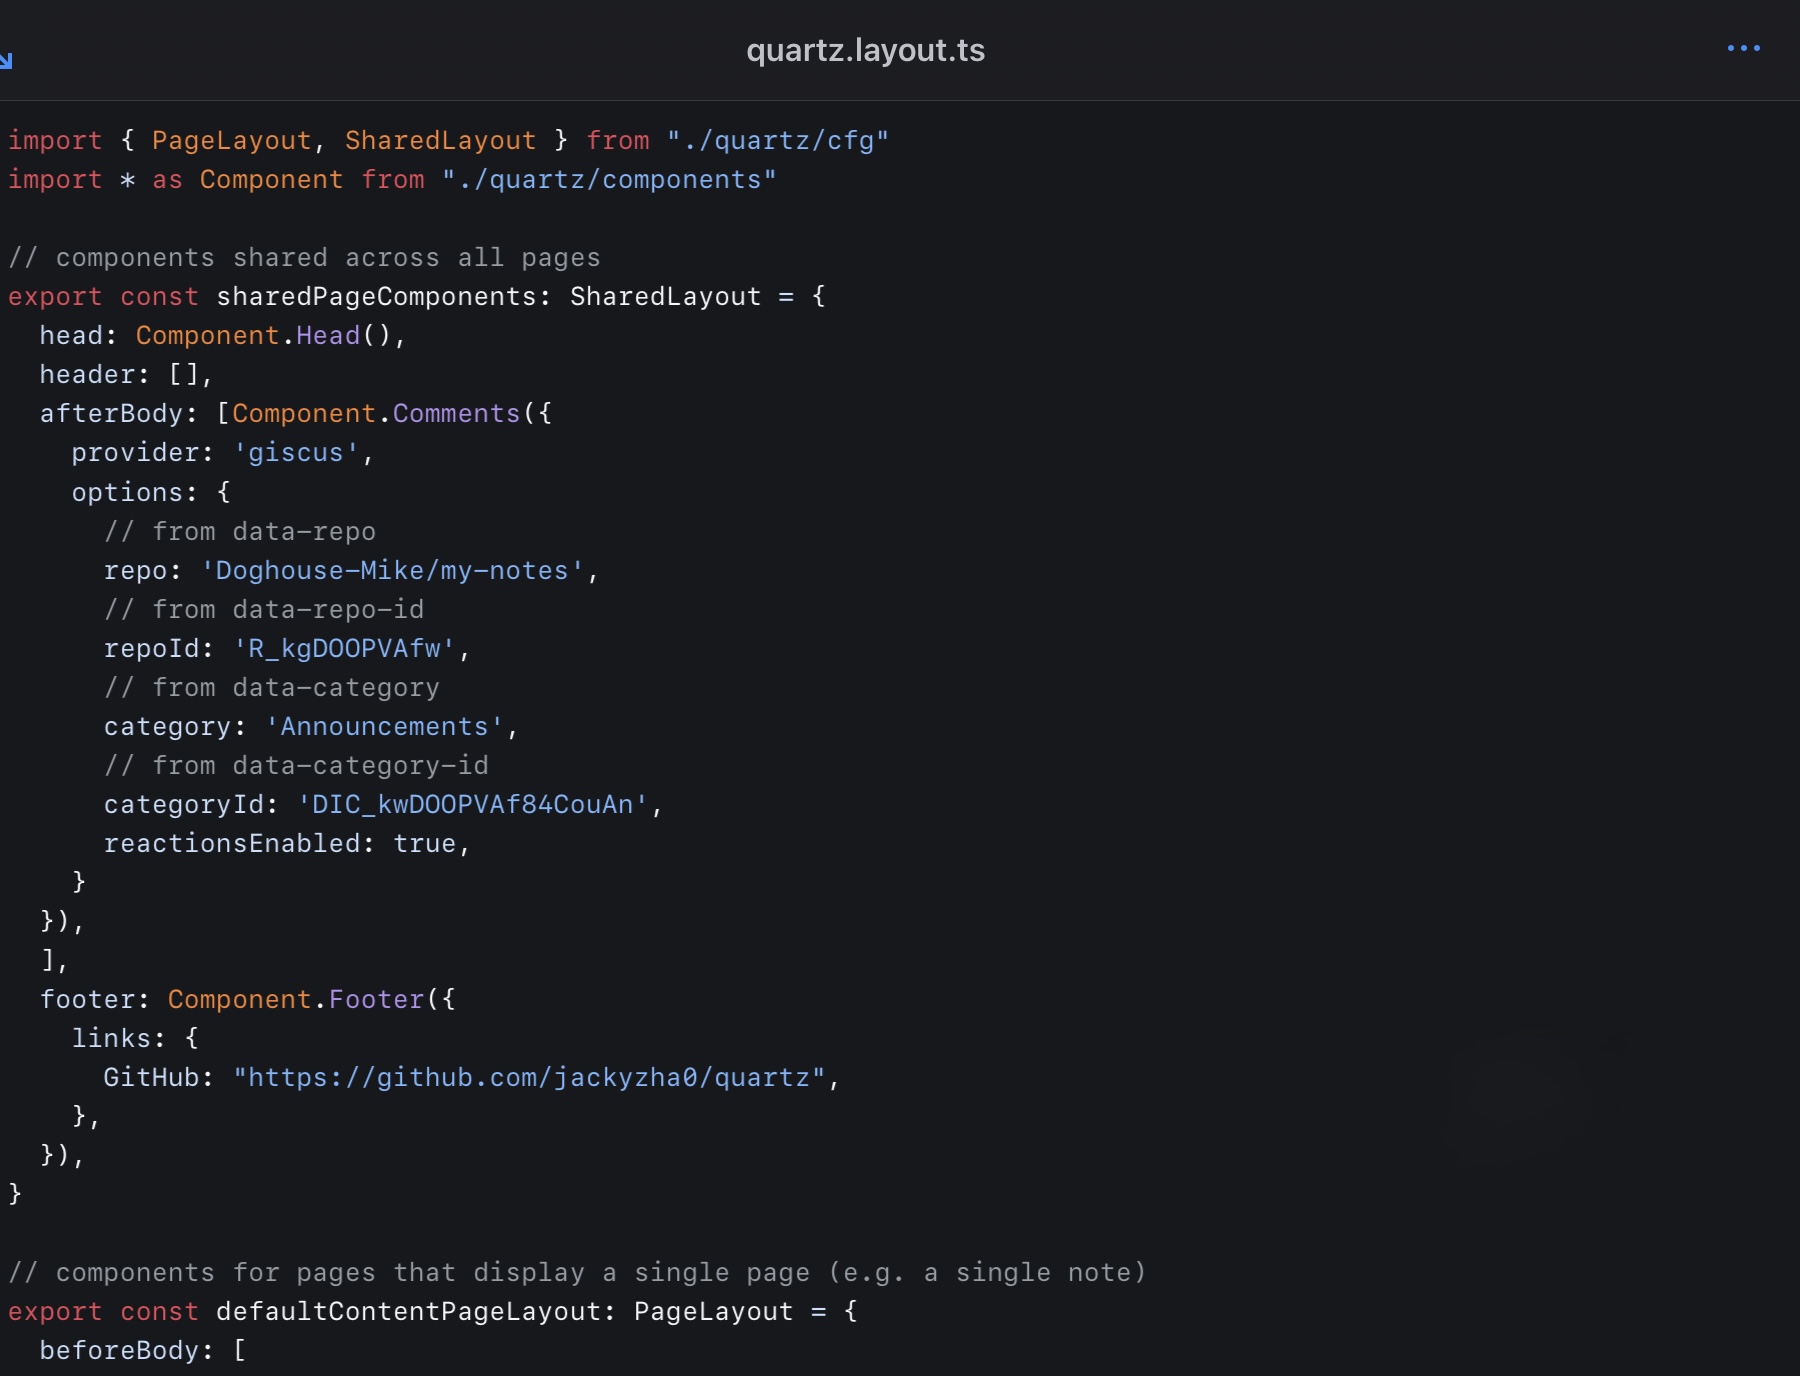
Mostly followed the official docs. I did get myself confused about the “Add the following ‘script> tag to your website’s template where you want the comments to appear” part. Can ignore that bit and skip to the “Finally, in quartz.layout.ts” section, and copying/amending the required bits, so it ends up looking something like this:
The Discord proved handy for this part too, even though I managed to do that thing where writing out the question led me to work out what the solution was almost right away. As you do.
“Clickable” Images
Somewhere on the Discord was mention of this to get a pseudo light box effect for images on the site. Dead easy to setup, create a new file, copy a line into another one, and Bob is your mum’s sister.
- Add file `clickableImages.ts` to your `quartz\plugins\transformers\`
- Append line `export { ClickableImages } from "./clickableImages"` to your `quartz\plugins\transformers\index.ts`
- Place line `Plugin.ClickableImages(),` to your `quartz.config.ts` in the end of `plugins: { transformers:` section
Sort Order in the Explorer (or List on the left)
This, my friends was a pain in the arse to get setup. It’s not actually that difficult, but took a few dead ends to get working correctly, so I include it here after some chats with the quartz deepwiki.
These lines need adding to the quartz.layout.ts file in GitHub.
The Explorer component appears twice in that file (lines 41 and 65 as I write this), both will need replacing with the below:
Component.Explorer({
  sortFn: (a, b) => {
    // First, sort folders before files
    if (a.isFolder && !b.isFolder) return -1
    if (!a.isFolder && b.isFolder) return 1

    // If both are folders, sort alphabetically
    if (a.isFolder && b.isFolder) {
      return a.displayName.localeCompare(b.displayName, undefined, {
        numeric: true,
        sensitivity: "base",
      })
    }

    // If both are files, sort by creation date (newest first)
    const aCreated = a.data?.date  // Changed from frontmatter.created
    const bCreated = b.data?.date  // Changed from frontmatter.created

    if (aCreated && bCreated) {
      return new Date(bCreated).getTime() - new Date(aCreated).getTime()
    }

    // If only one has a creation date, prioritize it
    if (aCreated && !bCreated) return -1
    if (!aCreated && bCreated) return 1

    // Fallback to alphabetical sorting
    return a.displayName.localeCompare(b.displayName, undefined, {
      numeric: true,
      sensitivity: "base",
    })
  },
})
Then there were some shenanigans about whether it’s “date” or “created” that’s important, turns out the “created” field from my frontmatter gets translated to “date” at some point, and another part of Quartz was deliberately removing that from what was passed on to the client side (read web browser). SO, in quartz/plugins/emitters/contentIndex.tsx there’s a line “delete content.date” that is to blame. Adding a couple of slashes in front of that “comments it out”. Changing just that line to ”// delete content.date” had everything working as expected.

There may be a cleaner way of doing it, but this works, good enough for me.
Semi-automated Posting from iPad
In theory it should be possible to set a Mac to run a shortcut/script/etc based on the Focus Mode one is in, but I’ve not been able to get that to work consistently. This is a bit better, and simpler than using rVNC (other apps are available) to remote into the Mac to run a terminal command.
- look into tailscale or something to get this working remotely ✅ 2025-05-04
Mac Shortcut:
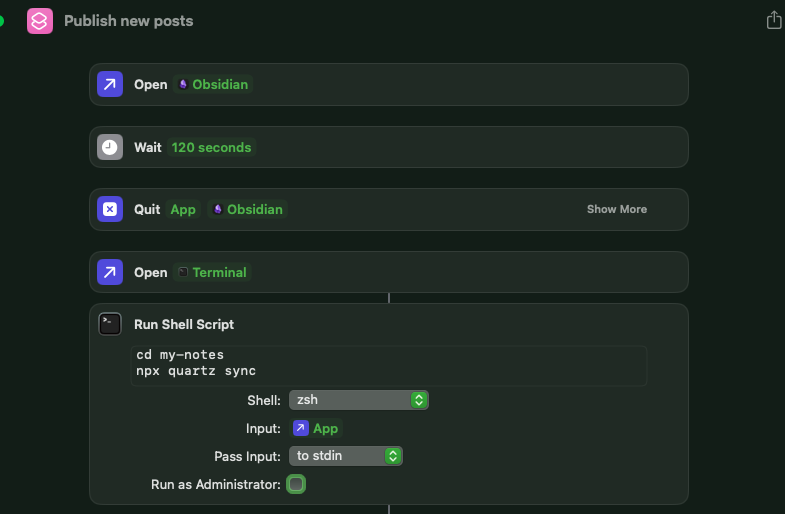
The “Wait” action is to give sync time to catch up. The npx quartz build command will very temporarily remove everything from the Content folder as part of the push to Github, and if Obsidian (with Sync) is running at the time, it will freak out big time. The “Wait” gets around that, two full minutes is a bit a long, but I’d rather be safe than sorry.
iOS Shortcut:
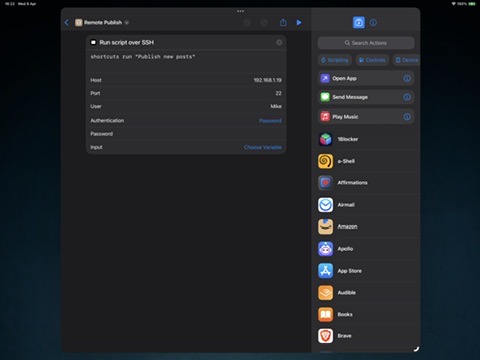
The first run will need authenticating on the Mac which means either remoting into it or sitting in front of the computer for a mo, but after that it should run silently.