Setting Up Quartz From Scratch Using Syncer
Prompted by some chats in the discord, a (hopefully) straightforward guide to getting Quartz set up with Obsidian. Mostly following the official docs. One could probably skip the first couple of steps if you’ve already got a Quartz repo, but this is a test to show you don’t need a local install of Quartz. I think I’d still prefer to have that local copy so a manual npx quartz sync etc remains available, even if 99% of the time publishing will be handled by the plugin. Then again, I guess that could be set up later if required.
I reserve the right to donk some technical terms. This entire thing was done using an iPad. As far as Obsidian goes it faces the same constraints as the smaller “mobile” versions, so apart from the bigger screenshots, this should be just as possible on a phone.
Install the Quartz Syncer Plugin
Kinda step zero. Don’t need to do anything with it yet, but good to have it ready to go for later.
Get Quartz Setup in Github
Just because that’s what I know. Other options are available.

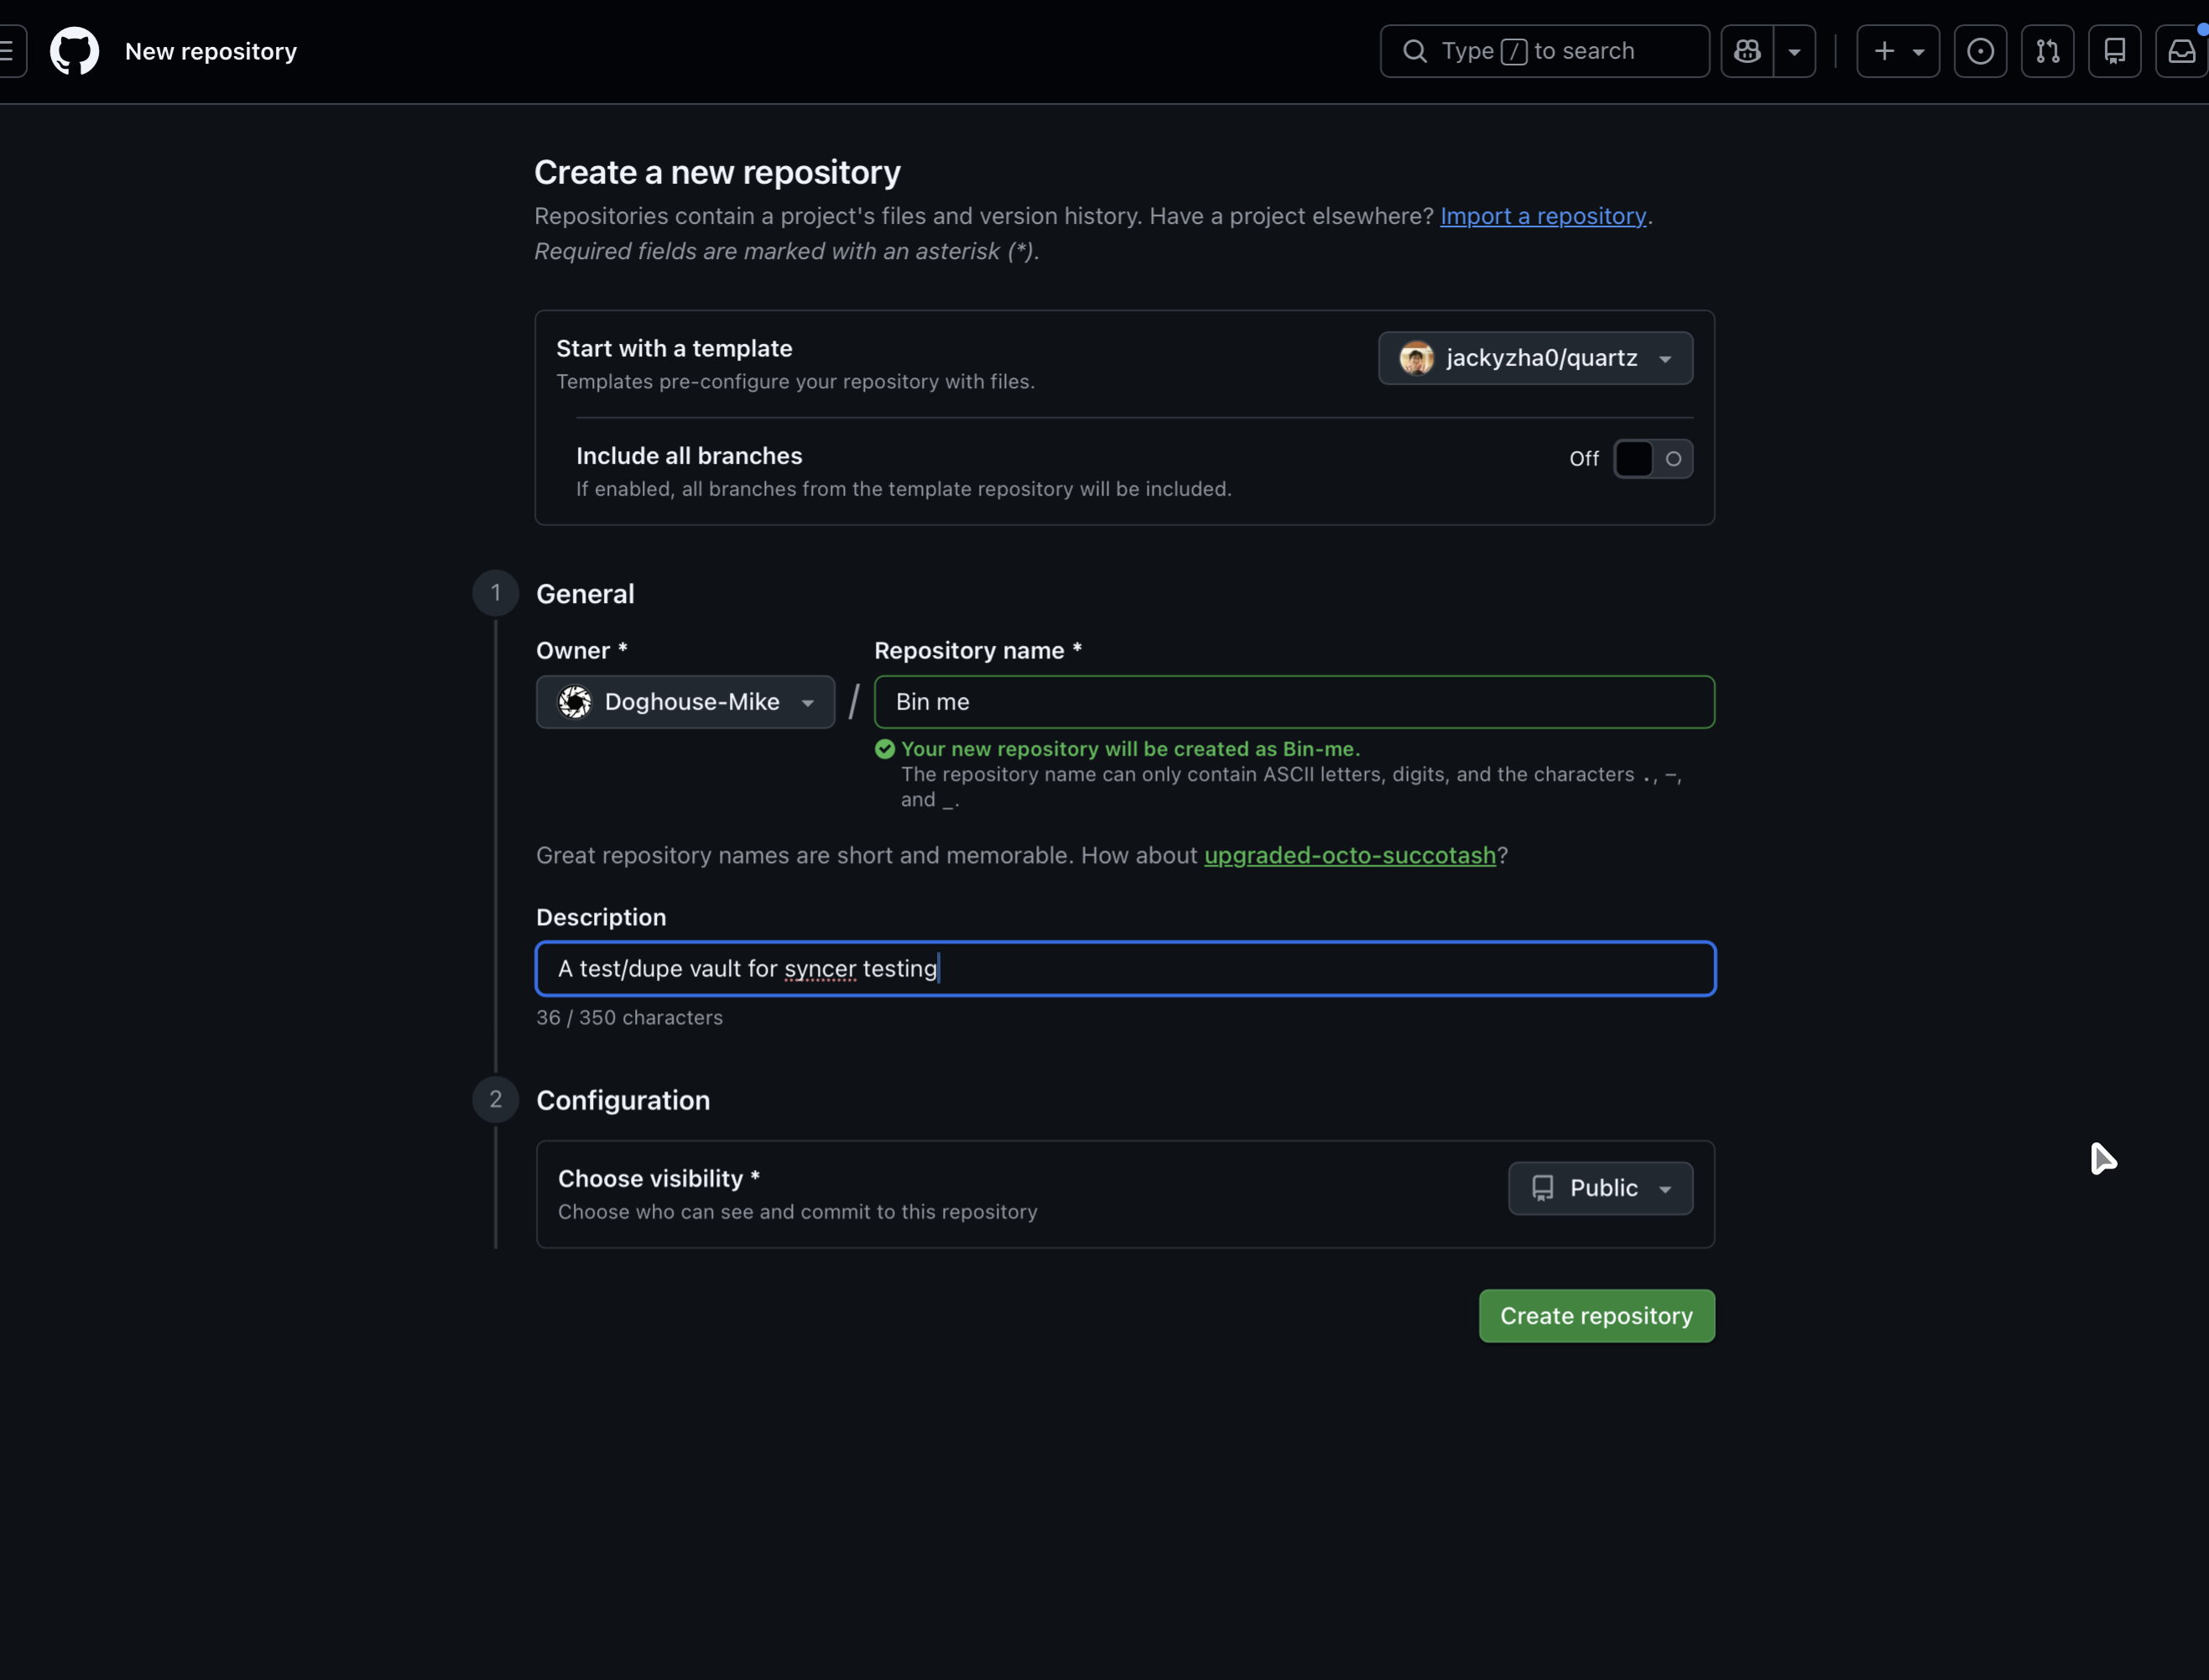
Click here to create a copy of the Quartz repo All of your own to futz with.
Name it, throw in a description, hit “Create repository”
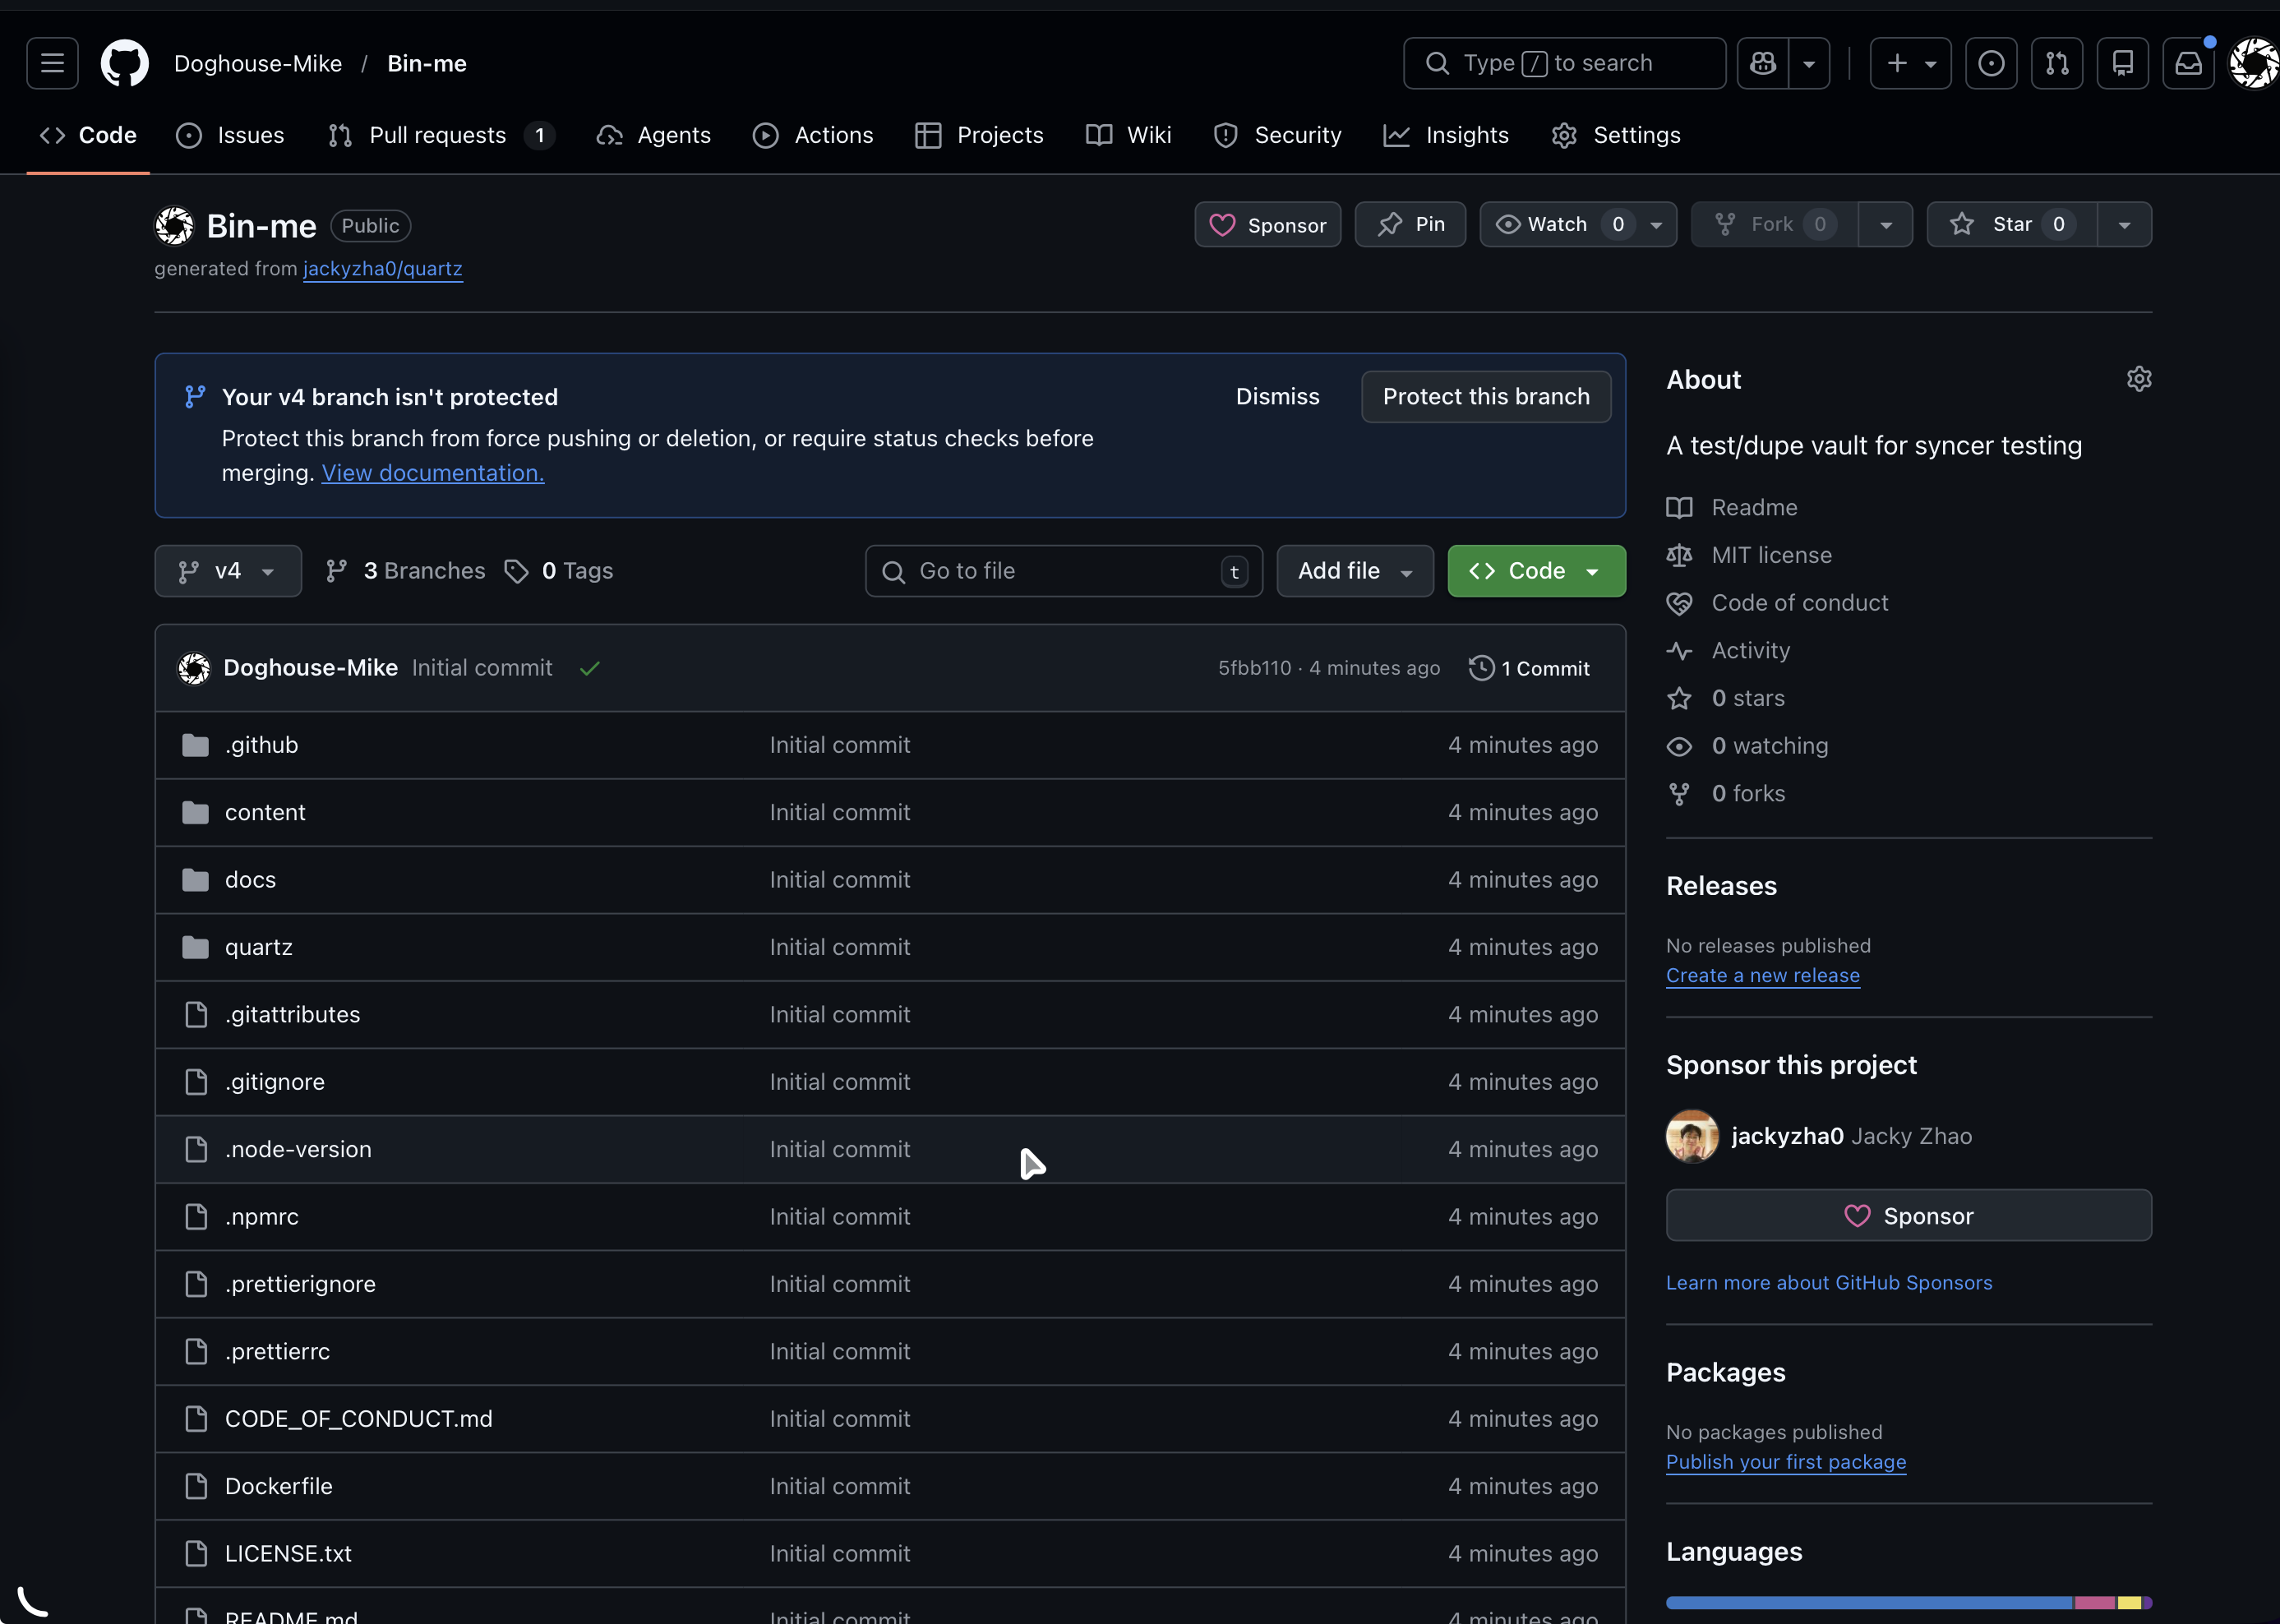
Enable GitHub Pages
- Go to your repository on GitHub.
- Navigate to Settings > Pages.
- Under Source, select GitHub Actions.
Create the deploy.yml File In the .github/workflows Folder
Click the “code” bit in the top left of the GitHub window
Then ya want that .github/workflows folder, then “Add file” (top right)
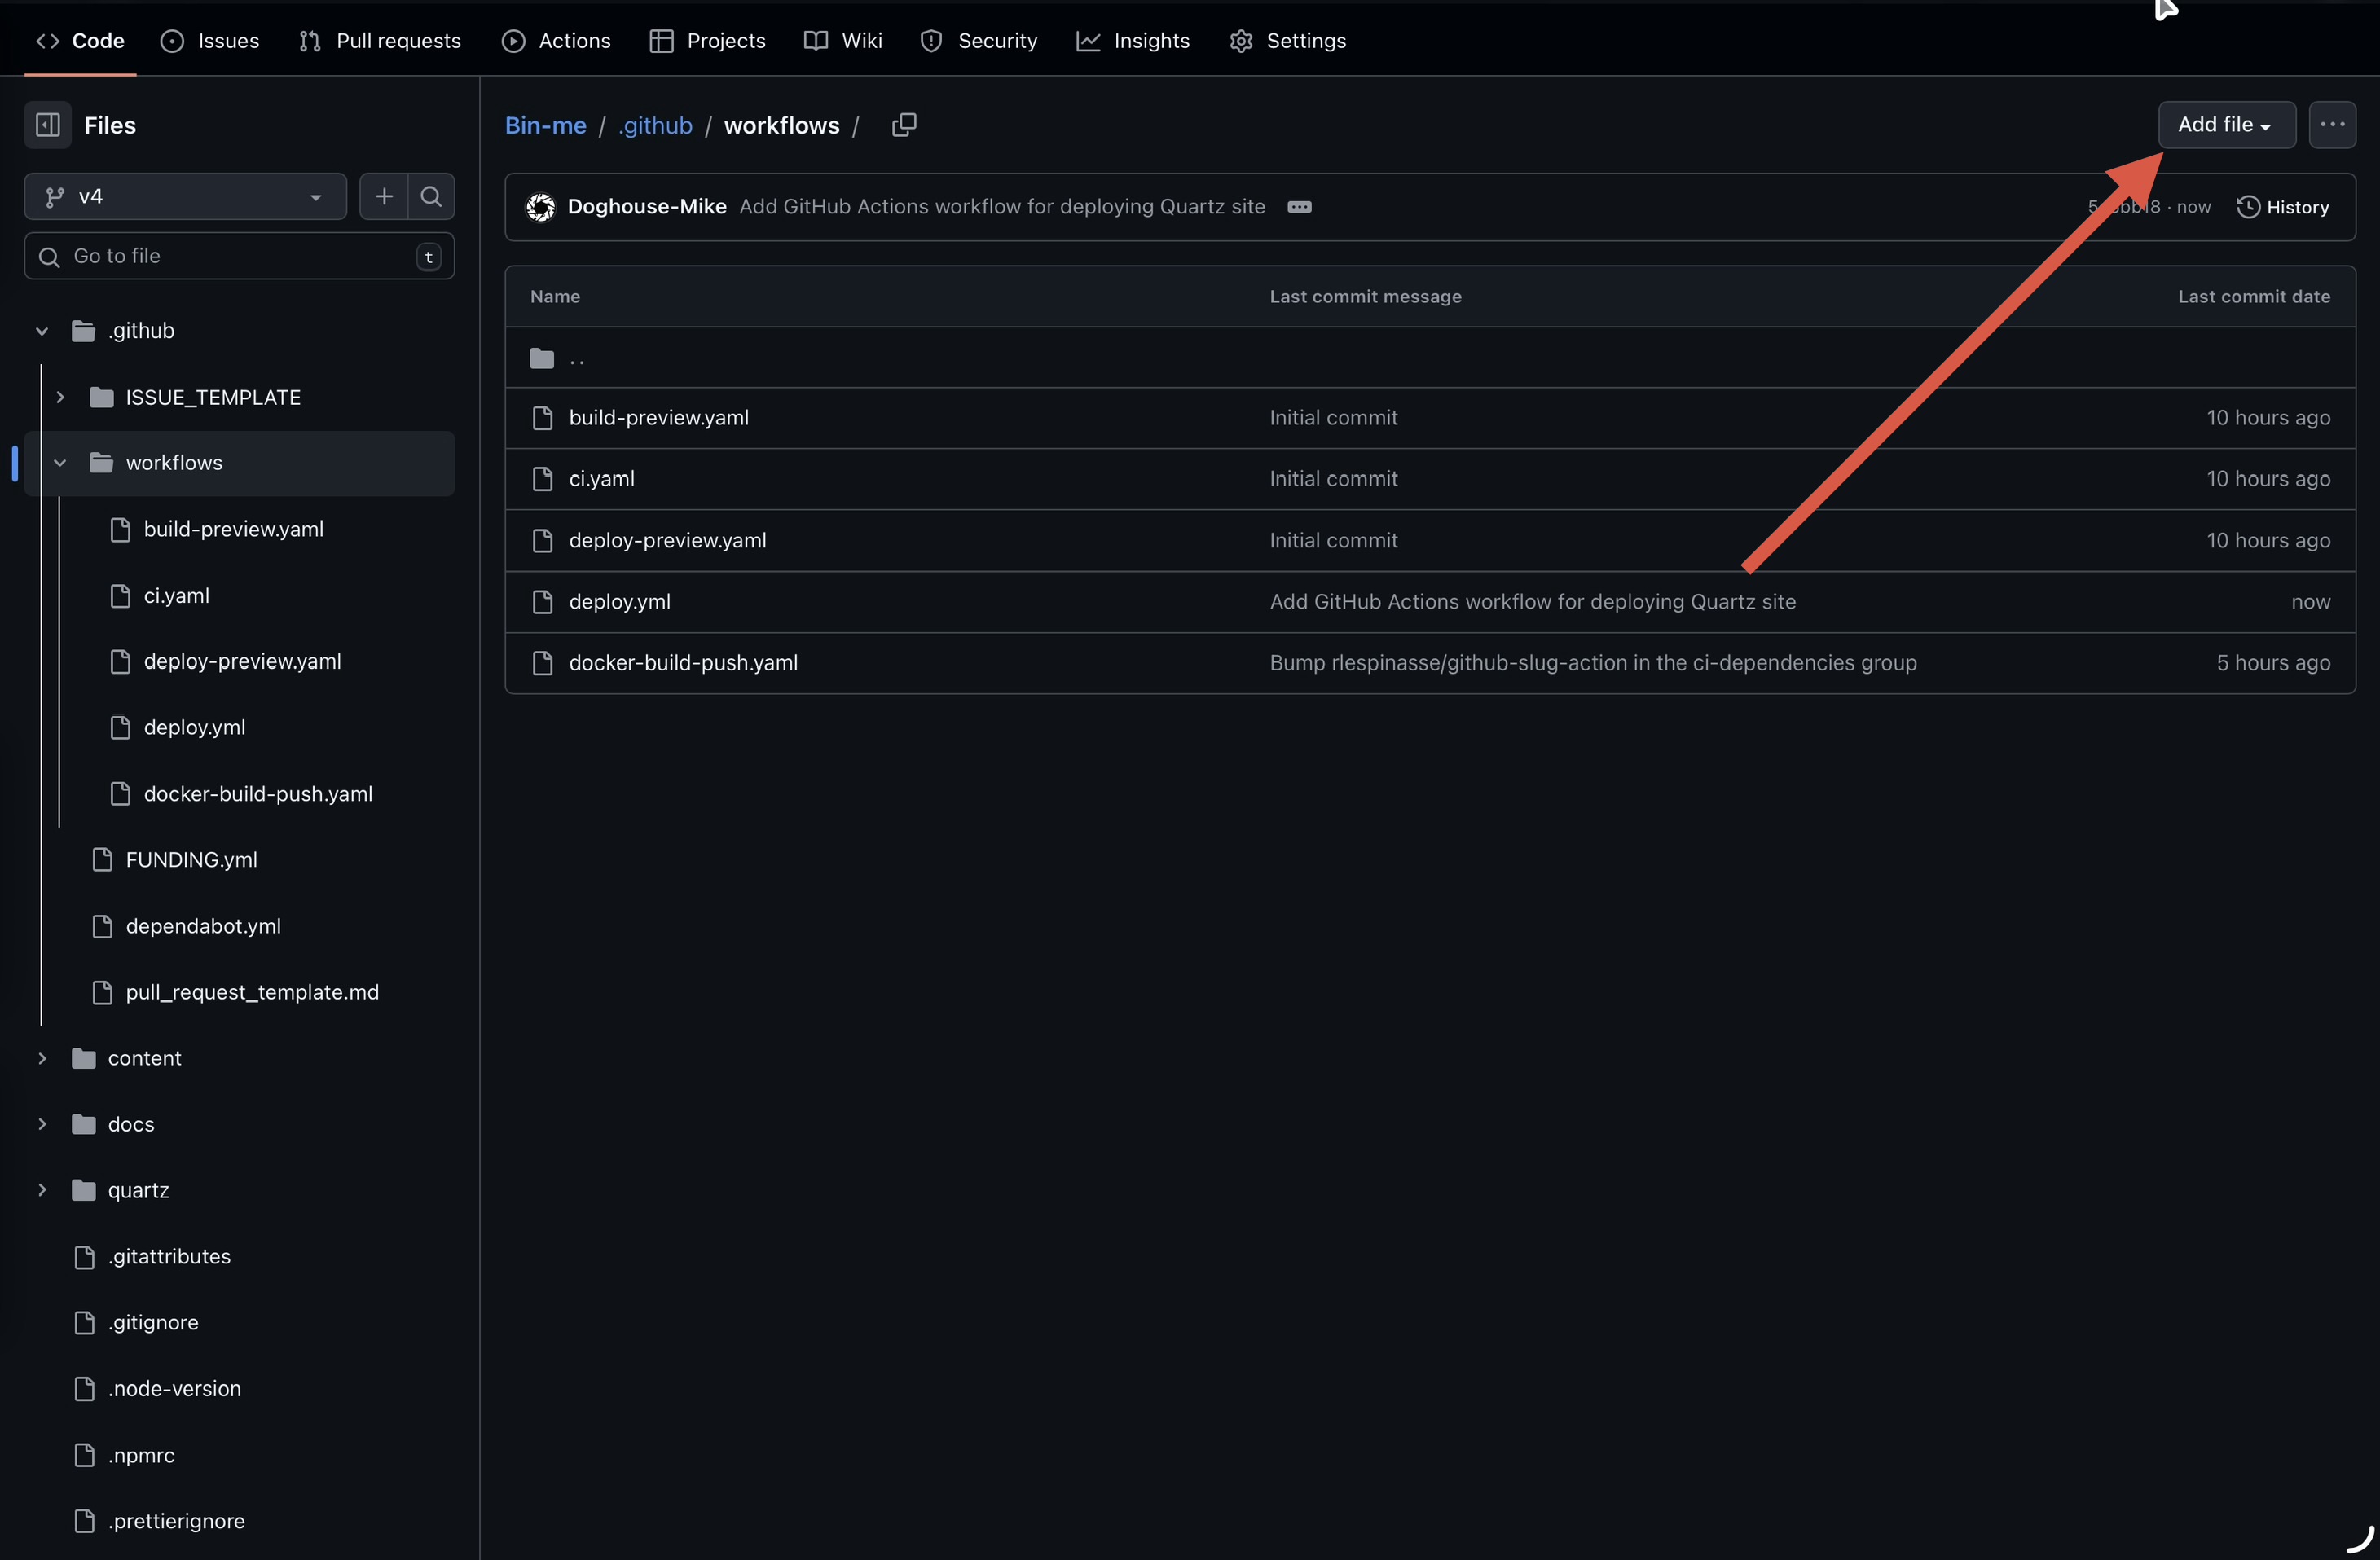
Copy/paste the code from this page, don’t forget to add the .yml extension or nothing will work. Not sure if case is important, but caught my iPad trying to capitalise “deploy”
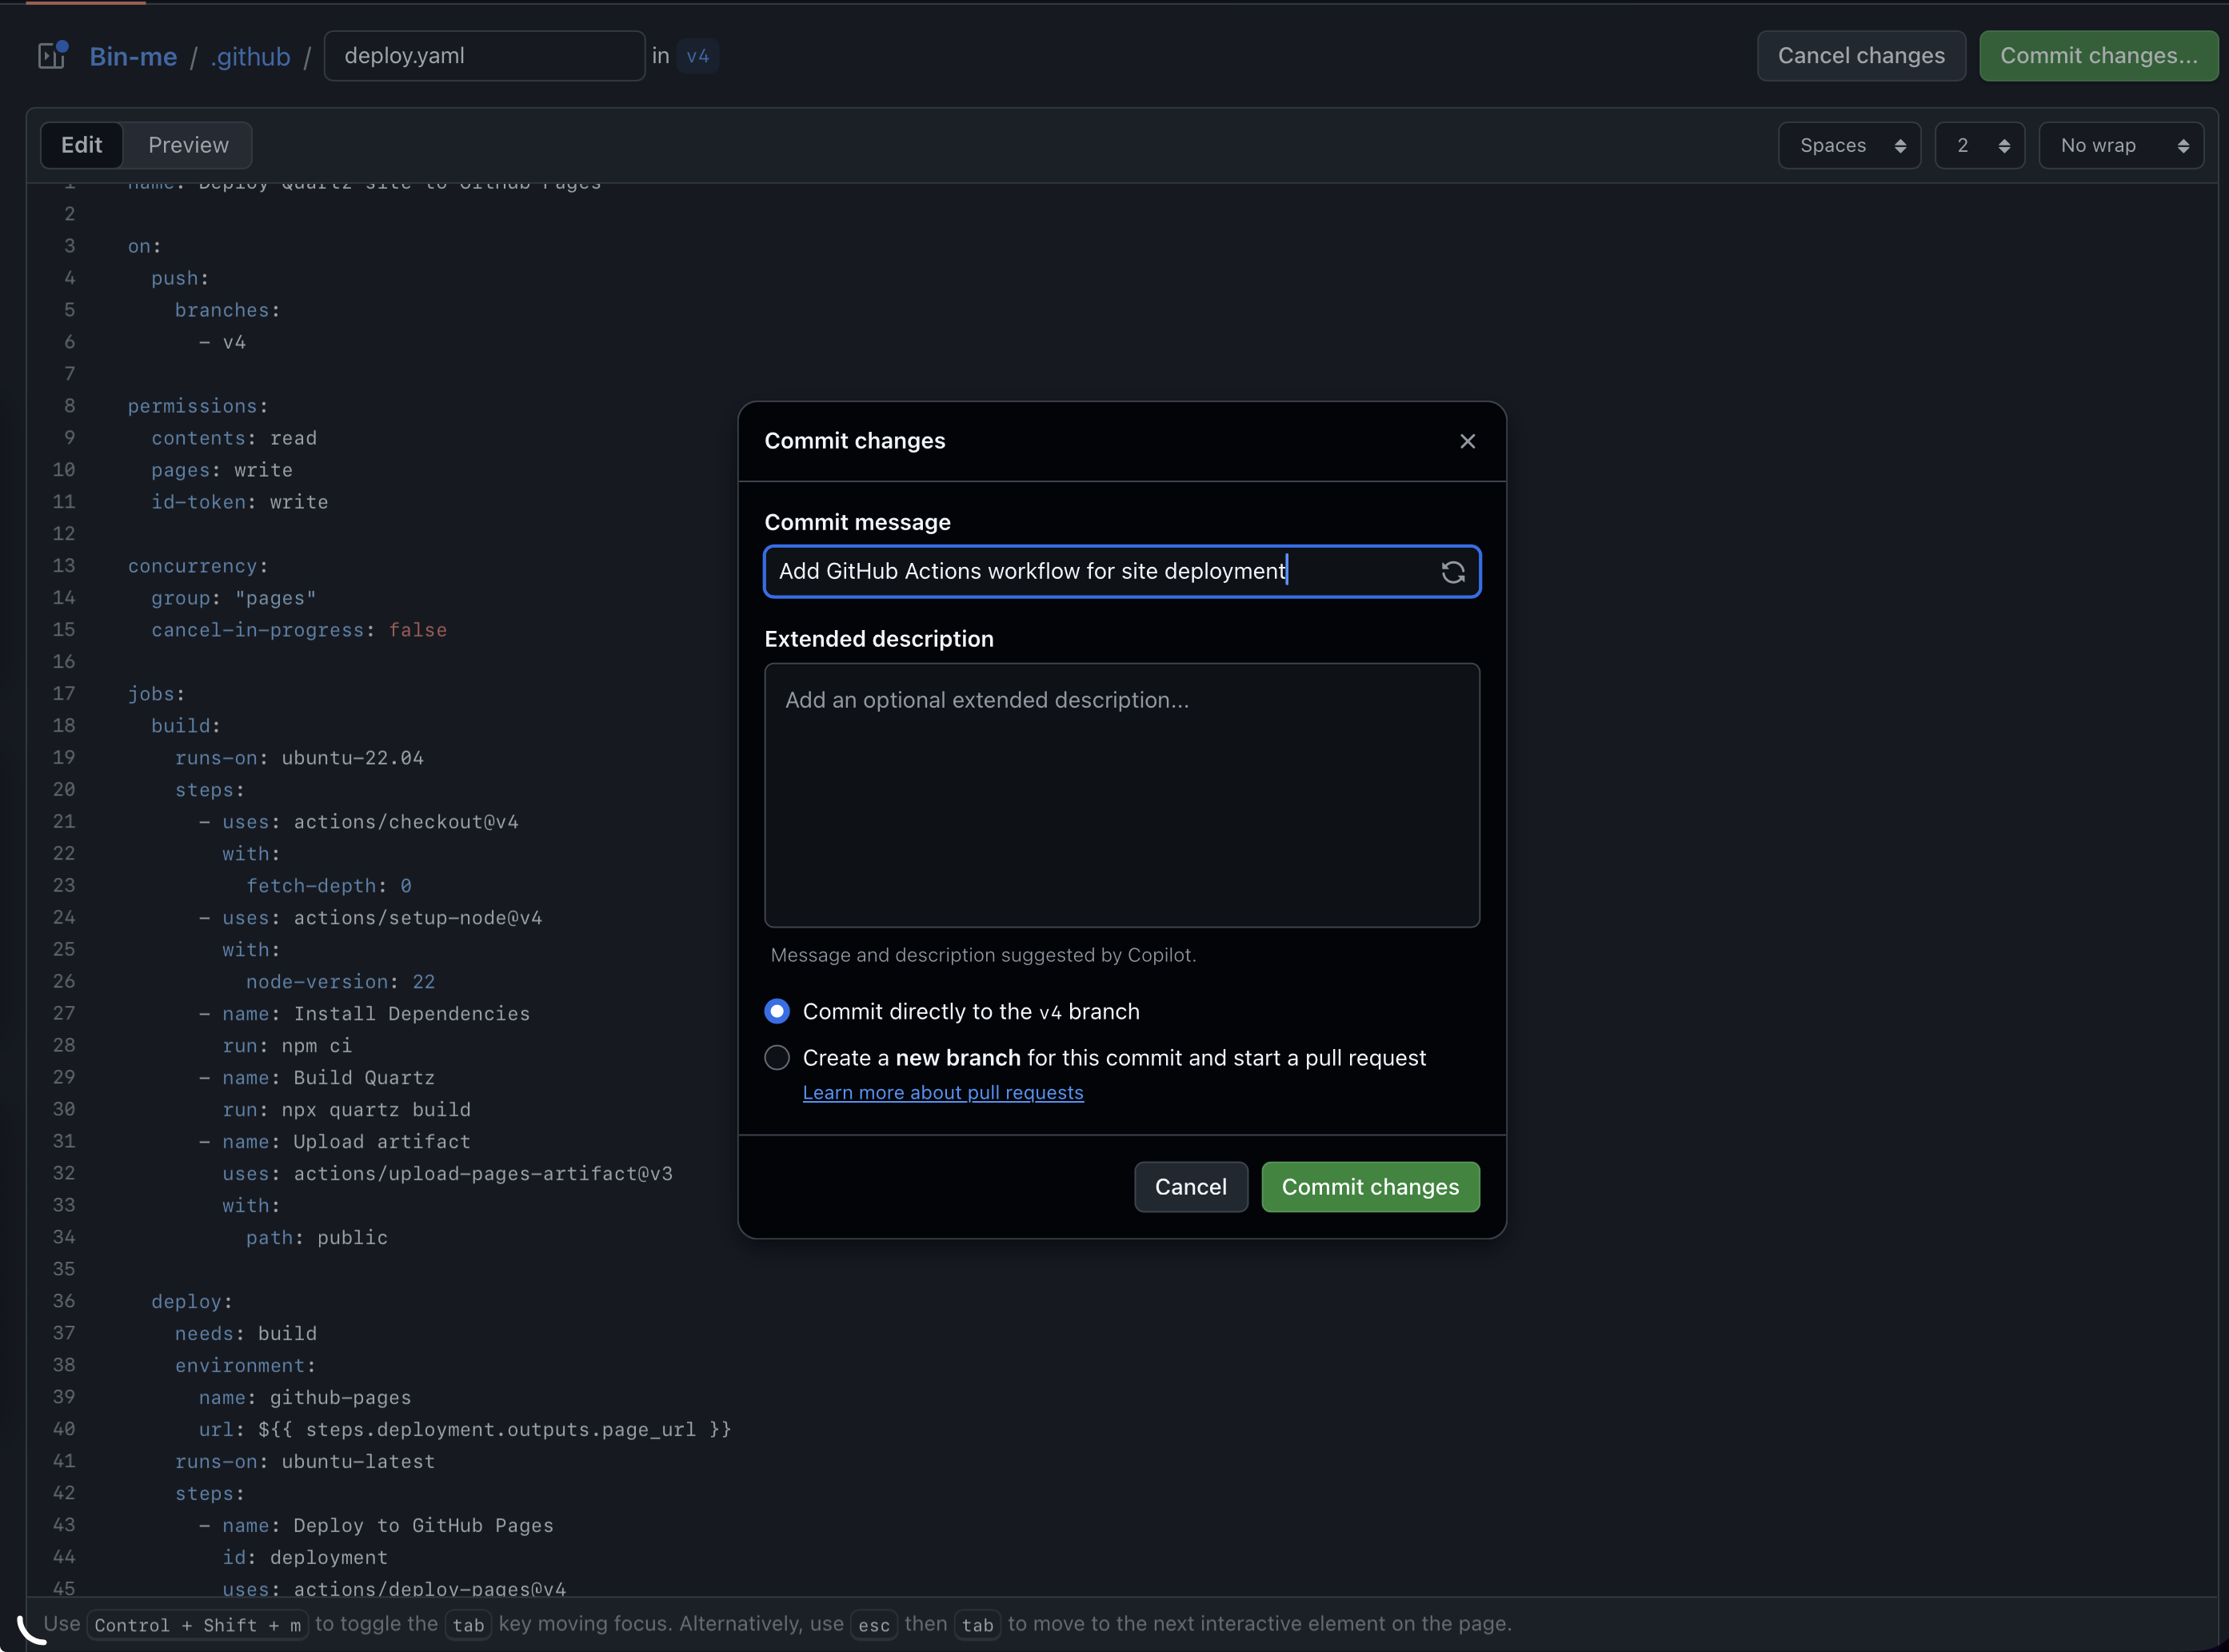
(Also that should by .yml, not the .yaml I’ve done in the screenshot. Insert facepalm emoji.)
Access Tokens
Setup Ala:
- Go to GitHub’s Personal Access Token page.
- Set a Token name
- Set an Expiration date
- Under Repository access, select Only select repositories and choose your Quartz repository.
- Under Permissions > Repository permissions, set Contents to Read and write.
- Click Generate token.
- Copy the token immediately.
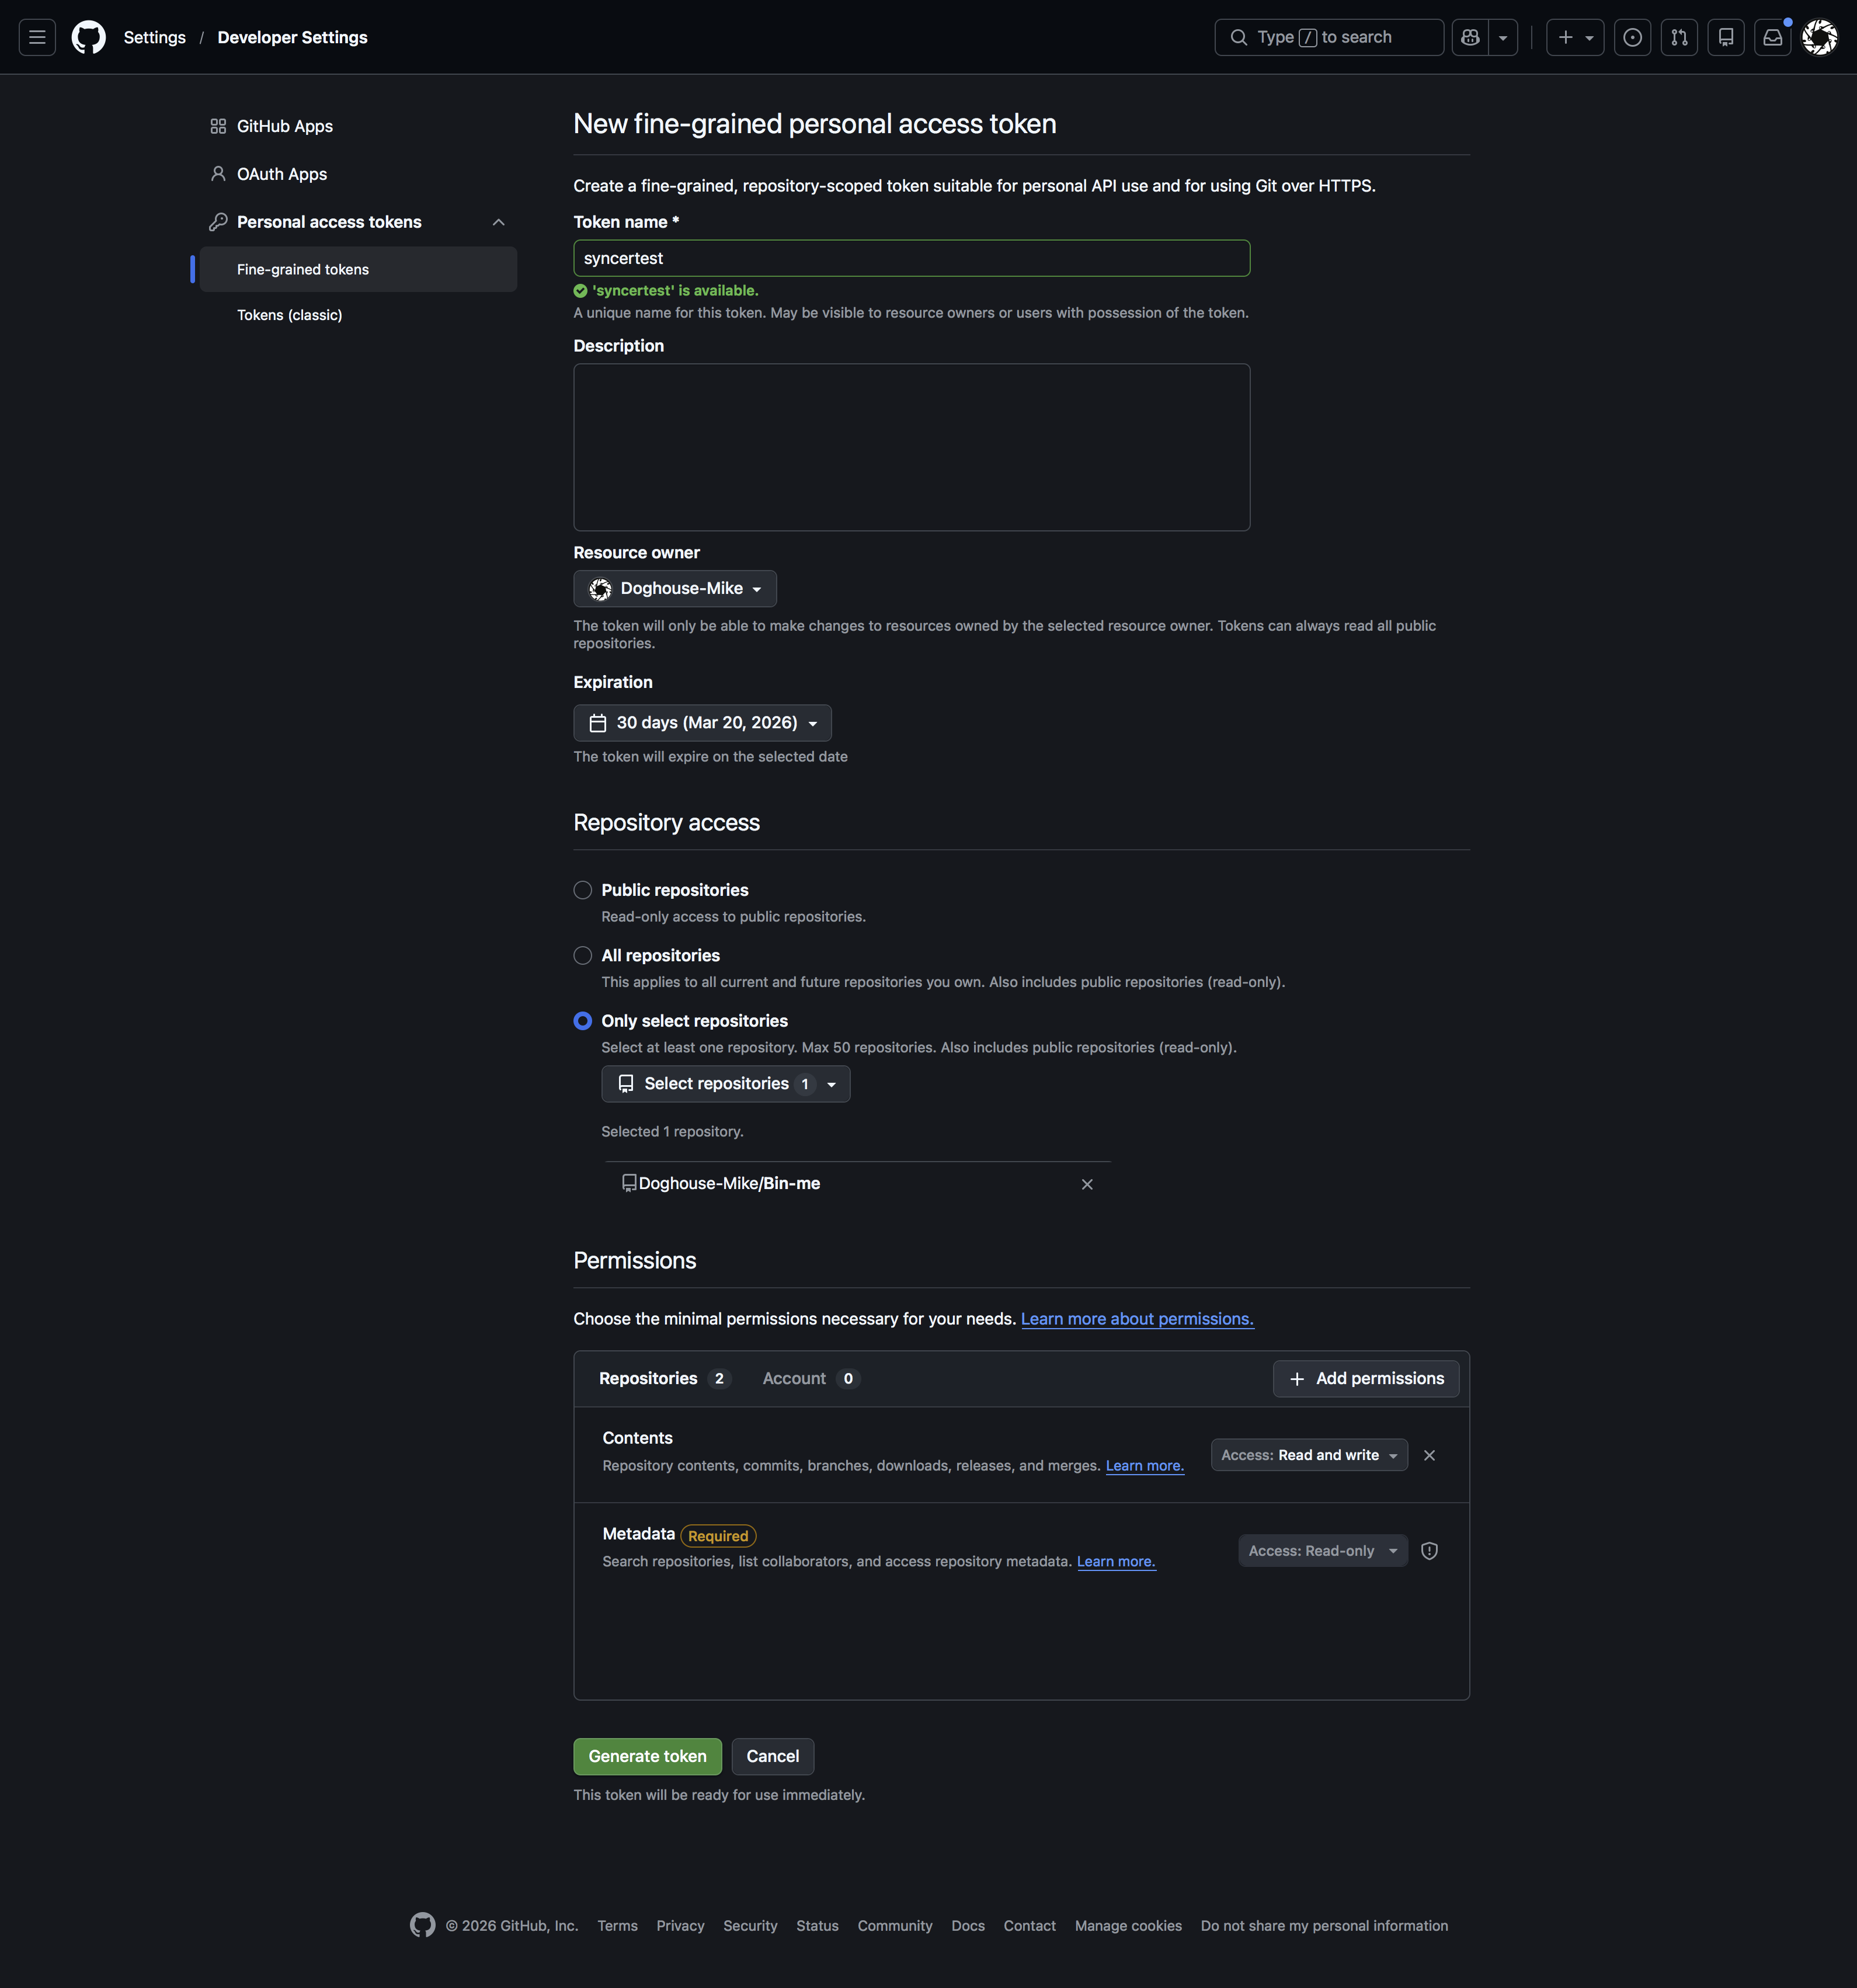
Could set the token to never expire, weigh the security/hassle ratio for yourself.
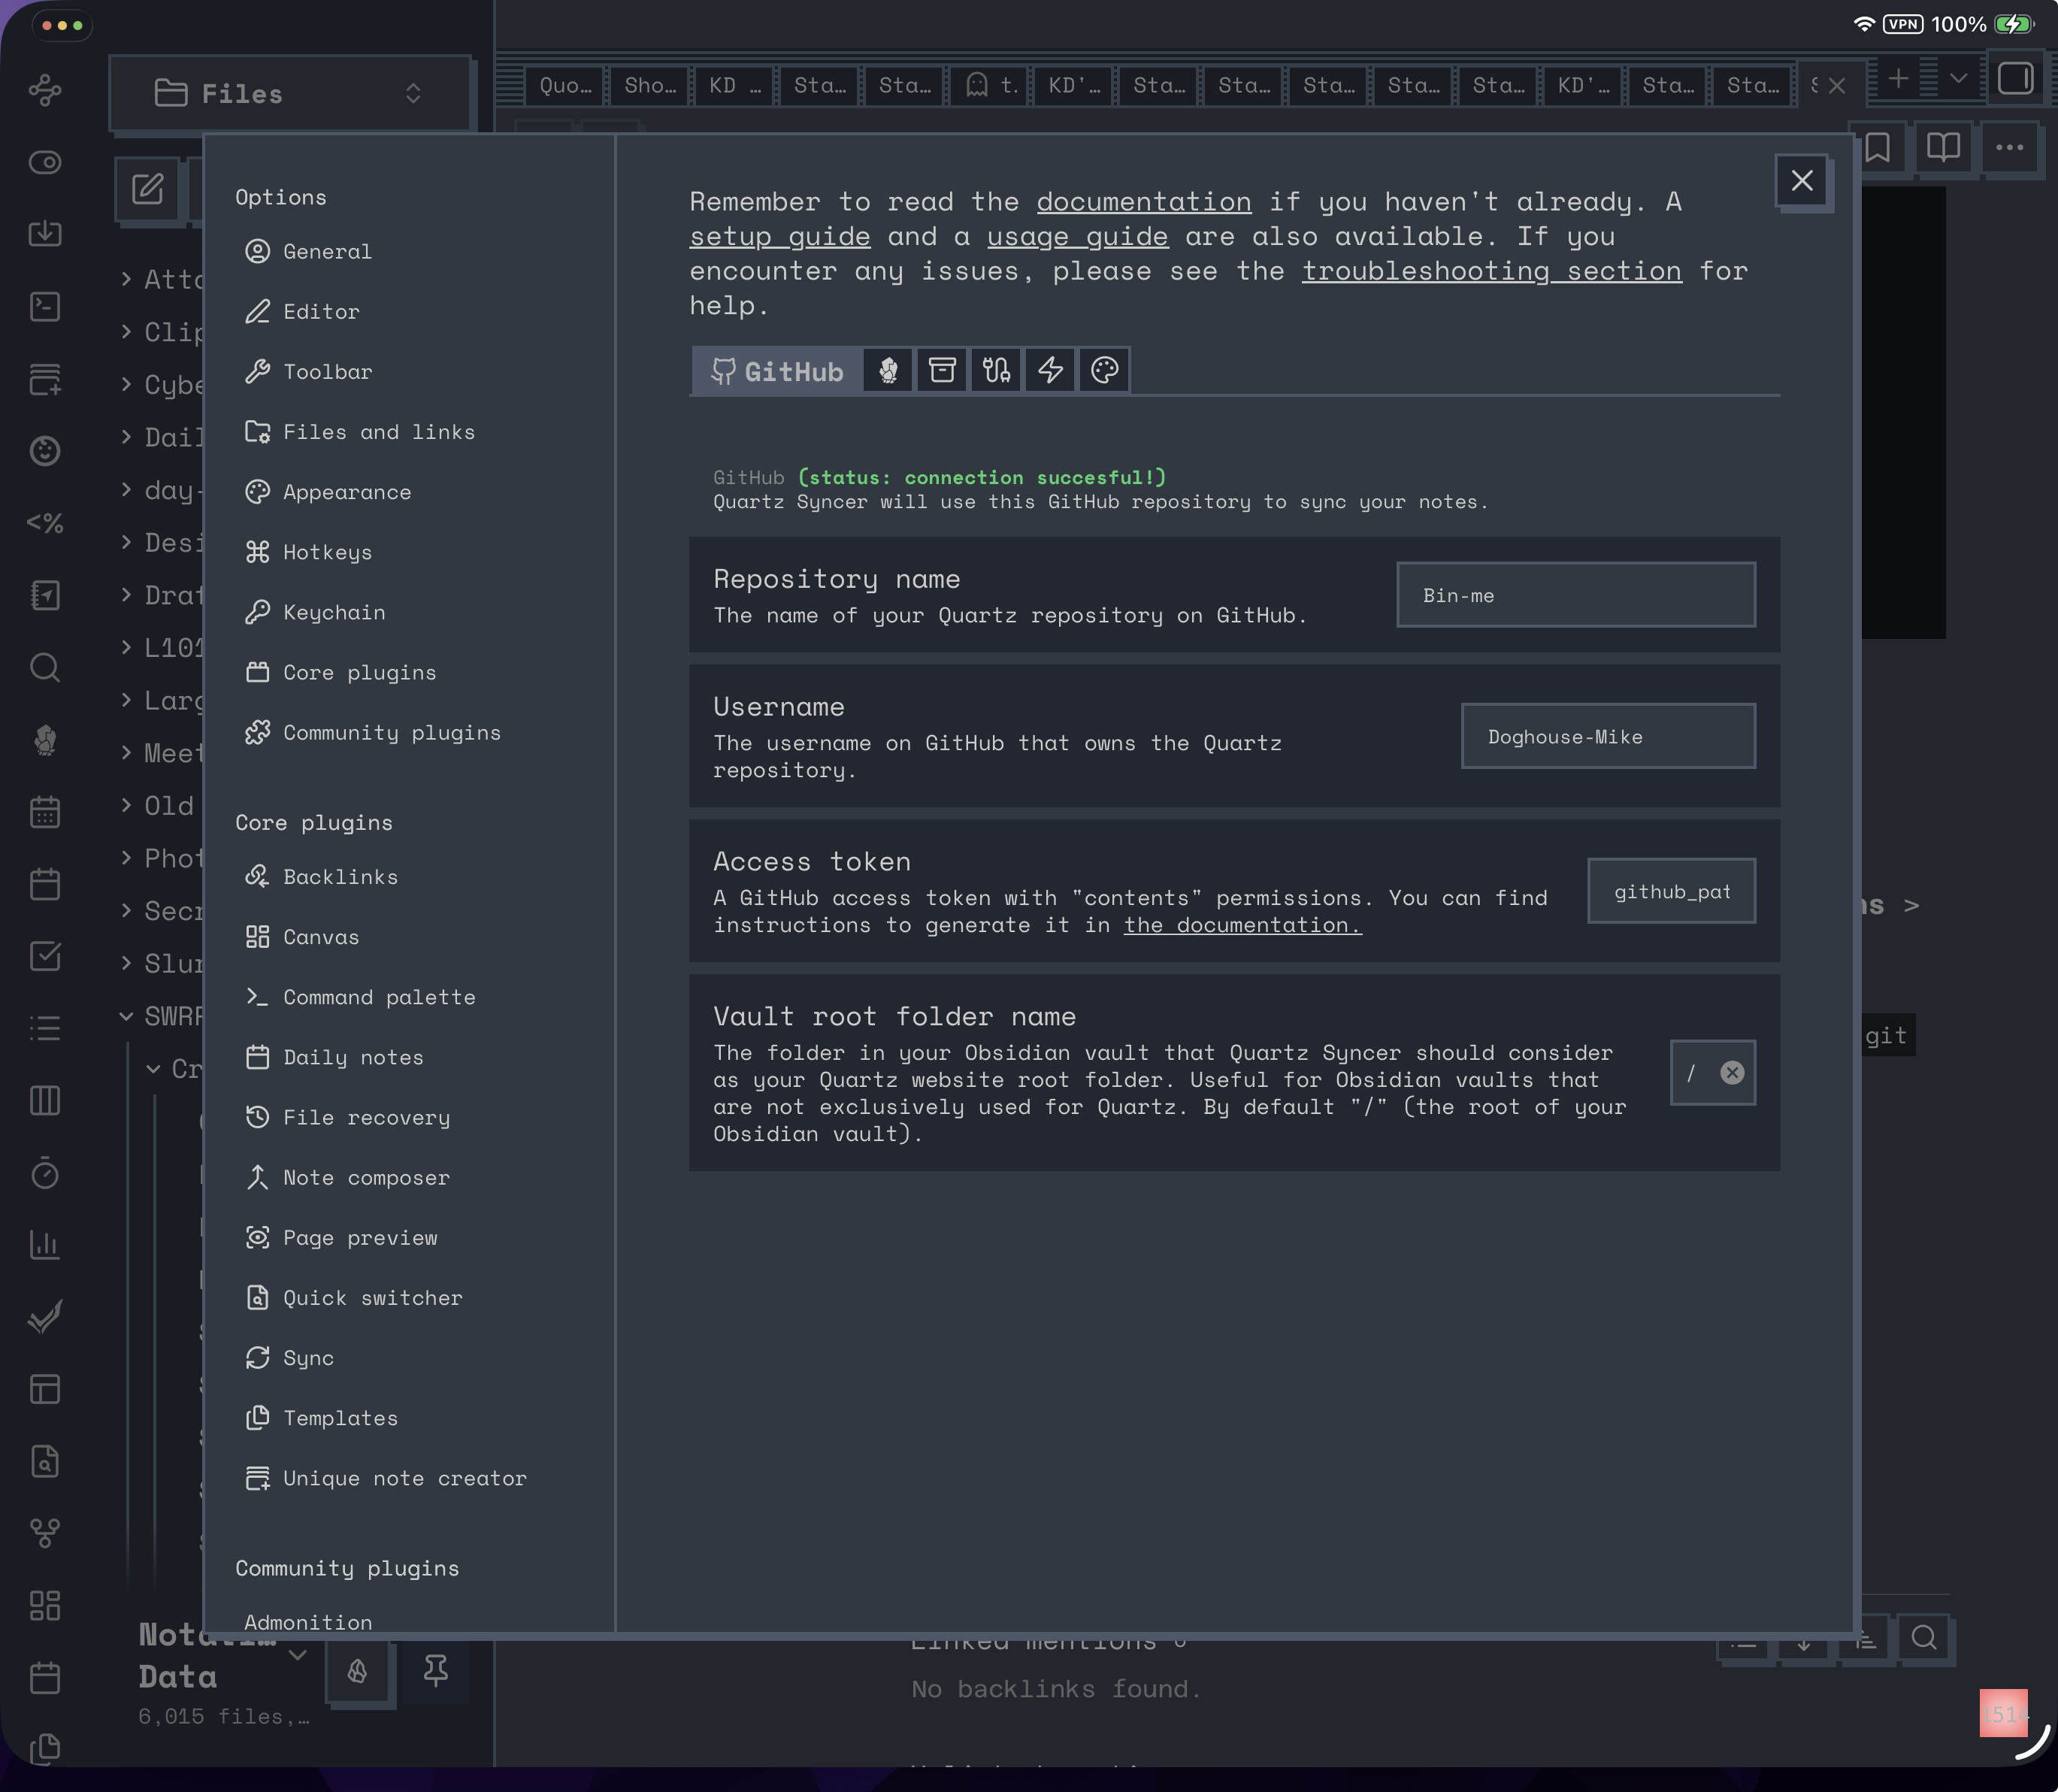
Set Up Quartz Syncer
- Open Obsidian and go to Settings > Community Plugins > Quartz Syncer.
- In the Git settings tab:
- Remote URL:
https://github.com/<username>/<repository>.git - Branch:
v4(or your Quartz branch) - Provider: GitHub
- Authentication Type: Username & Token/Password
- Username: Your GitHub username
- Access Token: The token you generated
- Remote URL:
A green checkmark indicates a successful connection.
(Yours will look different, based on theme, and obvs will have your GitHub deets)
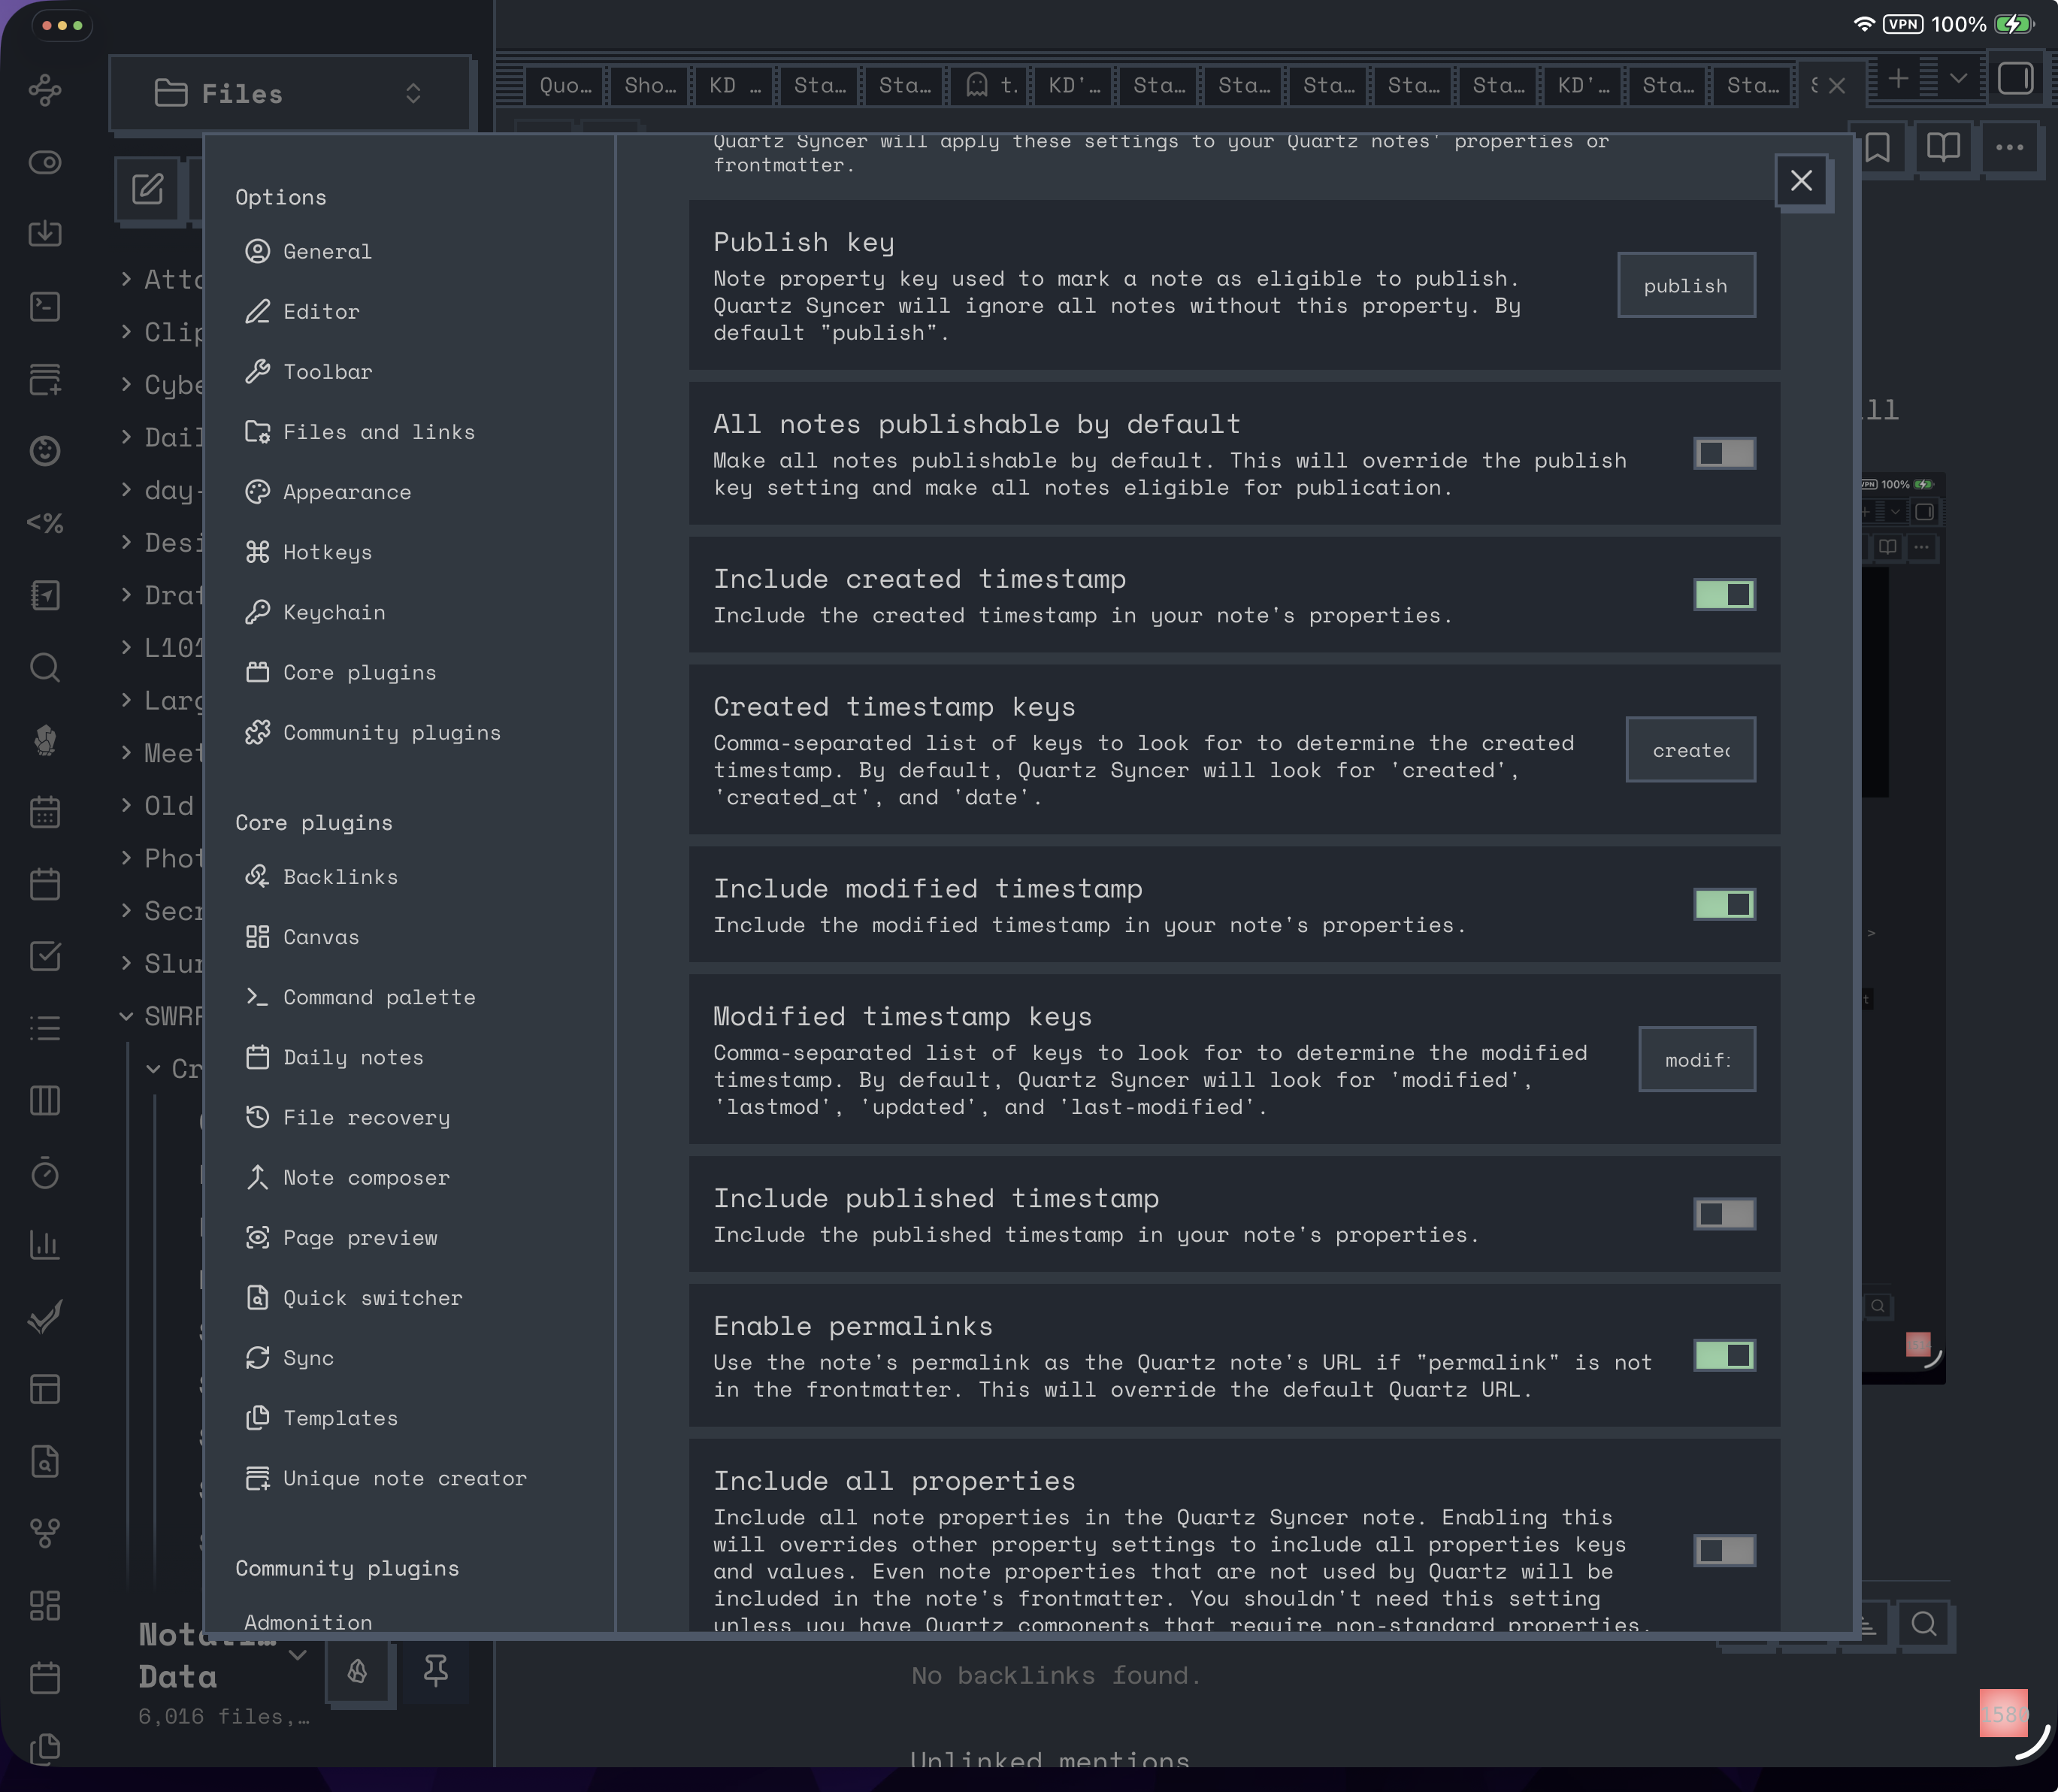
The rest of the settings are down to preference/setup, but mine look like:
I haven’t bothered setting up a custom domain for this repo, as it’s a test that I’ll probably throw away in a minute or five (Or just leave it to languish forever).
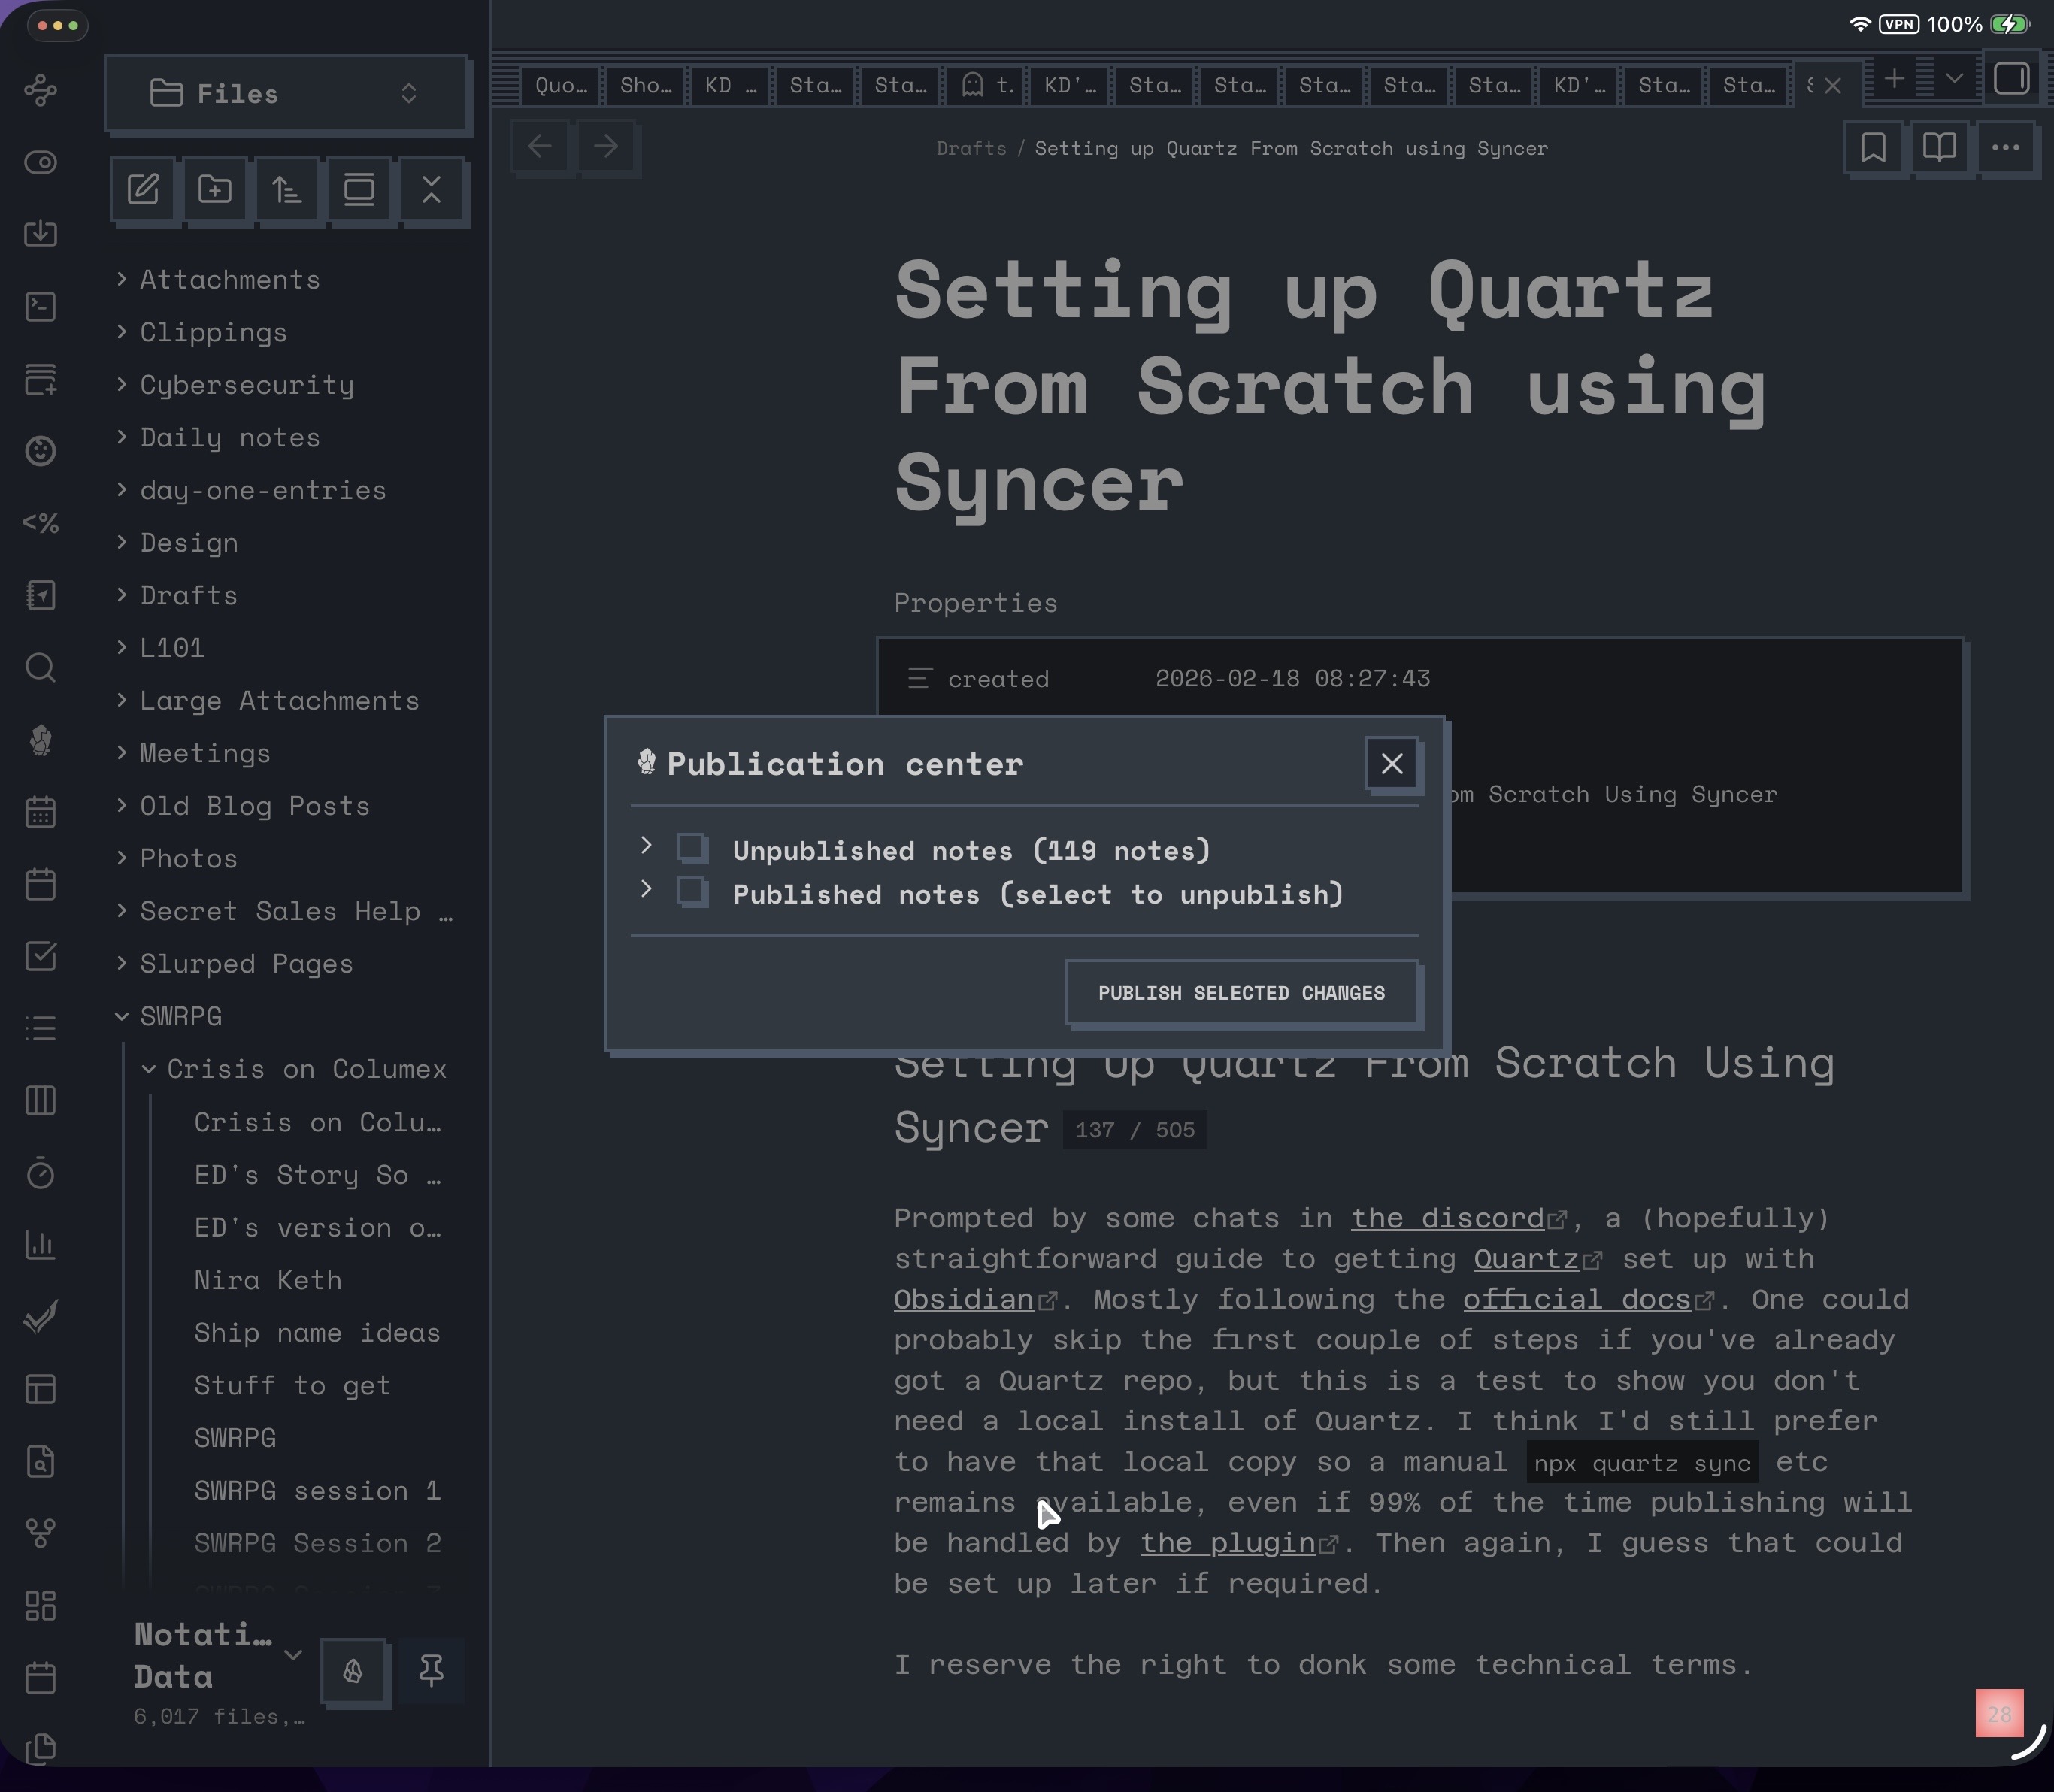
Hit that “Open Publication Centre” command, and give it a minute to think about it
This would be where I recall some parts from the official docs around tweaking quartz.config.ts with domains, comments, setting up themes etc. Some of which is covered in Mostly How I Built This Site but you get what you get.